


Building a Thermal Efficiency Analysis Dashboard – Development with SQL Server, .Net Core (API) & Angular
Tutorial
Written by a Human
Build a Thermal Efficiency Analysis Dashboard using SQL, Angular, .NET Core, and LightningChart JS high-performance charts.
Omar Urbano
Software Engineer

Introduction
It’s very common that, in most articles, we focus on the final product, generating a chart with a dataset and explaining its development. But I believe the real challenge lies in understanding and developing a complete project that generates stores, and transfers data between our front-end and the server, especially for a thermal efficiency analysis dashboard.
In this article, we will work with several technologies that are among the most chosen for complex developments, such as those needed for a robust thermal efficiency analysis dashboard.
- To generate and store our information, we will create a database with SQL Server.
- For communication between the database and our front-end, we will create an API with .NET Core (C# – Entity Framework).
- Finally, we will create a project in Angular to make HTTP requests, map, and plot our data.
While this project will not be highly complex, the goal is to create a functional base project from which we can build further. A project like this doesn’t make sense if we don’t show something relevant or important, so we will use the LightningChart JS library to create line charts, where we can display all our data points.
As always, we will use a case study to add more realism and context to our project. We will also discuss the topic of Thermal Efficiency Analysis of Industrial Heat, so I recommend you look at the theoretical part, as it will help you better understand the logic behind our database.
Not all the values in the database will be used, this is to give you the freedom to experiment and create an improved version of this project, perhaps adding even more features to our thermal efficiency analysis dashboard.
Before we dive into the theory, I’d like to briefly talk about the technologies we will be using. Remember, you will be able to download the entire project from this article, allowing you to explore the creation of a thermal efficiency analysis dashboard firsthand.
So, let’s get started!
SQL Server
SQL Server is a relational database management system (RDBMS) developed by Microsoft. Its main function is to store and manage large amounts of data in organized structures (tables, views, stored procedures, etc.) and facilitate efficient access, manipulation, and administration.
Some key features of SQL Server are:
- Relational: It uses a relational data model, where data is stored in tables that can be related to each other through primary and foreign keys.
- SQL Language: It uses SQL (Structured Query Language) to perform queries, updates, and data manipulation in databases.
- Security: It offers advanced security mechanisms, such as user authentication, permissions, and data encryption.
- Scalability and Performance: It is designed to handle large volumes of data and complex queries, making it suitable for both small businesses and large organizations.
- High Availability: SQL Server includes options such as replication, clustering, and failovers to ensure continuous availability of databases.
.NET Core
.NET Core is an open-source, cross-platform development framework created by Microsoft that allows developers to build high-performance applications and services. It is the modular and lighter version of the original .NET Framework, designed to be more flexible, faster, and suitable for modern applications such as cloud-based apps, microservices, and containerized applications.
.NET Core is compatible with multiple operating systems, including Windows, Linux, and macOS, making it an attractive choice for developing applications that need to run in different environments. It is also open source, meaning its source code is publicly available, and anyone can contribute to the project. It is licensed under the MIT License, making it easy to adopt.
Among its great advantages, it is optimized for high performance, with significant improvements in speed and efficiency, especially for web application and service development.
API – RESTful

An API (Application Programming Interface) is a set of definitions and protocols that allow different programs or systems to interact with each other. In other words, an API establishes the rules for one application to access the services or functionalities of another software, without needing to know its internal implementation.
RESTful is a term that refers to the architecture and design of web services that follow the principles of REST (Representational State Transfer). REST is an architectural style for developing applications that interact over a network, typically over HTTP. RESTful services use standard HTTP methods (GET, POST, PUT, DELETE, etc.) to perform operations on resources:
- GET: Retrieves information from a resource.
- POST: Creates a new resource.
- PUT: Updates an existing resource.
- DELETE: Deletes a resource.
Angular
Angular is an open-source web development framework maintained by Google. It is designed to facilitate the creation of single-page applications (SPAs) in an efficient and scalable way. Angular allows developers to build fast, dynamic, and easy-to-maintain applications. Angular uses components as the building blocks of the user interface.
Each component has its own set of logic, HTML structure, and styles, making the code more modular and reusable. Angular is particularly popular with large and complex applications due to its organized structure, its module system, and its ability to efficiently handle large-scale applications.
Development Ecosystem
Given the brief introduction to the technologies we will be using for our thermal efficiency analysis dashboard, I think it’s important to explain the logic of our development ecosystem.
A development ecosystem refers to the set of tools, resources, technologies, practices, and stakeholders that interact and collaborate in the process of creating and maintaining software, applications, or systems, such as our thermal efficiency analysis dashboard.
This concept is commonly used in the field of programming and technological development. In this case, very simply, our ecosystem is based on the generation, communication, transfer, and representation of our data for the thermal efficiency analysis dashboard.
The entire project will function locally, which is suitable for initial development of the thermal efficiency analysis dashboard, but that doesn’t mean it can’t operate through a network of servers to scale our thermal efficiency analysis dashboard.
Our project, focused on building a thermal efficiency analysis dashboard, could be represented as follows:

- Data Base: The database will be responsible for generating data and storing it on the server. This data will be generated through a stored procedure.
- API: The API will allow us to retrieve the data from our database, format it, and transfer it through an HTTP GET request, which will be generated by the Angular project.
- Front-End: This will be our web application, which will have immediate interaction with the user.
- User: The user will run the web application, which will trigger the entire process of communication and data transfer.
As a result, all data from our server will be processed and presented in the charts.
Now that all these concepts have been explained, let’s move on to the theory of the case study. With this, we’ll be ready to start the development.
Project Overview
Feel free to download the ZIP file to follow this thermal efficiency analysis dashboard project.

 Download the project to follow the tutorial
What is Thermal Efficiency?

Thermal efficiency basically tells you how good a system is at turning heat (or thermal energy) into useful energy or work. It’s like checking how much of the energy you put into something gets used for what you want, instead of being wasted as heat.
You can think of it like this: if you burn fuel in a car engine, thermal efficiency shows you how much of that energy moves the car, and how much is lost as heat, which goes into the exhaust or the engine itself. The formula for calculating it is simple:
Thermal Efficiency = (Useful Energy Output / Energy Input) x 100
So, for example, if a power plant burns fuel to make electricity, thermal efficiency tells you how much of the heat from burning the fuel gets turned into electricity, and how much gets wasted.
How to calculate Thermal Efficiency in %?
To calculate thermal efficiency in percentage, here’s a simple breakdown:
- Find the Useful Energy Output: This is the energy that does the job, like the work an engine does or the electricity a power plant generates.
- Find the Total Energy Input: This is the total energy you put into the system (like the fuel burned or the heat used).
- Use This Formula:
Thermal Efficiency % = (Useful Energy Output / Energy Input) x 100
What is temperature gradient?
A temperature gradient is just a way of saying how much the temperature changes over a certain distance. For example, if you’re walking from a warm spot to a cold spot, the temperature gradient tells you how quickly the temperature drops (or increases, if you’re going the other way).
It’s usually measured as how many degrees the temperature changes per unit of distance, like degrees per meter or Celsius per kilometer. Basically, it shows you how fast or slow the temperature is changing as you move from one place to another. To calculate the temperature gradient in °C, all you need to do is figure out how much the temperature changes over a certain distance.
Temperature Gradient = (Change in Temperature / Distance)
Let’s say you’re measuring the temperature along a metal rod. You have one end at 80°C and the other at 20°C, and the rod is 4 meters long.
- Temperature difference: 80°C – 20°C = 60°C
- Distance: 4 meters
- Temperature Gradient: Based on the formula, the temperature gradient is 15°C per meter, meaning for every meter you move along the rod, the temperature changes by 15°C.
Why can’t heat engines achieve 100% thermal efficiency?
The main reason is the Second Law of Thermodynamics. Basically, it says that no matter how hard you try, some energy will always be lost as heat to the surroundings. It’s like trying to use all your energy to do something, but you’re always going to waste a bit of it. In a heat engine (like a car or a power plant), you burn fuel to create heat, and that heat is used to do work (like moving a piston or turning a turbine).
But not all that heat turns into useful work. Some of it just escapes as waste heat, which you can’t use.
How can the efficiency of a heat engine be increased?
If you want to make a heat engine more efficient, here are some ways to do it:
- Increase the Temperature of the Heat Source (Hot Side):
The hotter the “hot side” (where the engine gets its heat), the better. The bigger the temperature difference between the hot side and the cold side, the more efficient the engine will be.
Why it works: The bigger the temperature difference, the more energy you can turn into work. For example, in power plants, using higher temperatures in the furnace or boiler can boost efficiency, but there’s a limit because materials can only handle so much heat.
- Lower the Temperature of the Heat Sink (Cold Side)
If you can make the “cold side” (where the waste heat goes) as cold as possible, you’ll make the engine more efficient. Less heat will be wasted, and more energy can be used for work.
Why it works: A cooler cold side means you lose less heat, so more energy stays in the system. For example,better cooling systems, like the big towers at power plants, can help reduce waste heat and make things run more efficiently.
Better materials and insulation help keep heat where it’s supposed to be and reduce losses. Also, stronger materials mean less friction in moving parts, which makes the engine run smoother.
SQL Server Database
We will now create the database “ThermalEfficiencyDB” containing five tables:

The table “_EFMigrationHistory” is generated by the Entity Framework, so there is no need to worry about building it.
- Reservoirs Table: Stores information about the cold and hot reservoirs (temperatures in Celsius).
- Efficiency Calculations Table: Stores the thermal efficiency calculations based on the temperatures.
Locations Table:
- LocationName: The name of the location (e.g., “Room 1”, “Field A”).
- Latitude and Longitude: Optional fields to store geographical coordinates of the location.
- TemperatureReadings Table: LocationID: The location where the reading was taken, linked to the Locations table.
- TemperatureCelsius: The temperature measurement in Celsius.
- MeasurementTime: The date and time when the reading was taken.
TemperatureGradients Table:
- LocationID: The location where the gradient is calculated, linked to the Locations table.
- StartReadingID and EndReadingID: The start and end readings for the gradient calculation, linked to the TemperatureReadings table.
- DistanceMeters: The distance over which the gradient is calculated (in meters).
- TemperatureGradientCelsiusPerMeter: The calculated temperature gradient in Celsius per meter (°C/m).
Creating the Stored Procedure: GenerateRandomEfficiencyData
This stored procedure generates random data to simulate thermal efficiency calculations between a hot and a cold reservoir, which are commonly used in thermodynamics to model energy efficiency in heat engines and can be valuable for a thermal efficiency analysis dashboard. The generated data could then be utilized to populate a thermal efficiency analysis dashboard for visualization and analysis.
→ Random Temperature Generation: Hot Reservoir Temperature (@HotTempCelsius):
This generates a random value between 30°C and 120°C for the hot reservoir temperature. RAND() generates a random float between 0 and 1. The formula (RAND() * (120 - 30)) + 30 scales the result to the desired range (30 to 120). ROUND(..., 2) ensures the result is rounded to two decimal places.
SET @HotTempCelsius = ROUND((RAND() * (120 - 30)) + 30, 2);→ Cold Reservoir Temperature (@ColdTempCelsius):
This generates a random value between 0°C and 25°C for the cold reservoir temperature. Similar to the hot temperature generation, the formula RAND() * (25 - 0) scales the random value to the range [0, 25].
SET @ColdTempCelsius = ROUND ((RAND() * (25 - 0)), 2);→ Generating Random Time: Random values for the hour, minute, and second are generated to create a random timestamp for each record.
DECLARE @RandomHour INT = FLOOR(RAND() * 24);  -- Random hour between 0 and 23
DECLARE @RandomMinute INT = FLOOR(RAND() * 60);  -- Random minute between 0 and 59
DECLARE @RandomSecond INT = FLOOR(RAND() * 60);  -- Random second between 0 and 59
The random time is then added to the @CurrentDateTime to generate the final @DateRecorded:
SET @DateRecorded = DATEADD(SECOND, @RandomSecond, DATEADD(MINUTE, @RandomMinute, DATEADD(HOUR, @RandomHour, @CurrentDateTime)));→ Inserting Data into the Reservoirs Table: The procedure inserts the hot and cold reservoir temperatures, along with the generated time, into the Reservoirs table.
SCOPE_IDENTITY() is used to retrieve the ID of the last inserted row, which is stored in @HotReservoirID and @ColdReservoirID for later use.
INSERT INTO Reservoirs (ReservoirType, TemperatureCelsius, DateRecorded)
        VALUES ('Hot', @HotTempCelsius, @DateRecorded);

        SET @HotReservoirID = SCOPE_IDENTITY();

        -- Insert into Reservoirs Table for Cold Reservoir with the calculated DateRecorded
        INSERT INTO Reservoirs (ReservoirType, TemperatureCelsius, DateRecorded)
        VALUES ('Cold', @ColdTempCelsius, @DateRecorded);

        SET @ColdReservoirID = SCOPE_IDENTITY();
→ Carnot Efficiency Calculation: The Carnot Efficiency formula is used to calculate the theoretical efficiency of a heat engine operating between two thermal reservoirs.
Carnot Efficiency (%) = (1 – (Cold Temperature + 273.15) / (Hot Temperature + 273.15)) * 100
Carnot Efficiency is based on the temperatures of the cold and hot reservoirs in Kelvin, so we add 273.15 to both the hot and cold temperatures (in Celsius) to convert them to Kelvin.
SET @EfficiencyPercentage = (1 - ((@ColdTempCelsius + 273.15) / (@HotTempCelsius + 273.15))) * 100;→ Inserting Efficiency Data: After calculating efficiency, the procedure inserts a record into the EfficiencyCalculations table with the IDs of the hot and cold reservoirs, the calculated efficiency percentage, and the time of the calculation (@DateRecorded).
INSERT INTO EfficiencyCalculations (HotReservoirID, ColdReservoirID, EfficiencyPercentage, CalculationDate)
VALUES (@HotReservoirID, @ColdReservoirID, @EfficiencyPercentage, @DateRecorded);
Creating the Stored Procedure: GenerateRandomData
This stored procedure, named GenerateRandomData, is designed to simulate the generation of temperature gradient data for random locations. The procedure inserts random data into three tables: Locations, TemperatureReadings, and TemperatureGradients.
The stored procedure generates 1000 entries, with each entry representing a location and its associated temperature readings and gradients. It performs the following actions for each iteration:
- Inserts a random location with a name, latitude, and longitude.
- Inserts two random temperature readings for the location: a start and an end reading, with associated timestamps.
- Calculates a temperature gradient based on the two readings and a random distance.
- Insert the calculated temperature gradient into the TemperatureGradients table.
Data Details:
- Location Data: For each iteration, a random location is generated with a random latitude and longitude.
- Temperature Data: Two random temperature readings are generated for each location (start and end) with a 1-hour interval between them.
- Temperature Gradient Data: A random distance (1-100 meters) is generated, and the temperature gradient is calculated using the formula:
.NET Core API
To create this project, which will involve building a thermal efficiency analysis dashboard, we must consider multiple points that will allow us to execute it. To begin, you will need to have Visual Studio 2022 or the latest available version installed.
You should have the .NET environment installed on your computer. To create an API for our thermal efficiency analysis dashboard, you should open Visual Studio, create a new project, and select the option: This setup will be crucial for the backend of our thermal efficiency analysis dashboard.

Once this project is created, you will need to install the following packages:
- Microsoft.EntityFrameworkCore (9.0.0): This is the main package for Entity Framework Core. It provides the core functionality of EF Core, including entity change tracking, LINQ query generation, and database connection management.
- Microsoft.EntityFrameworkCore.Design (9.0.0): This package is an extension to the main EF Core package. Its primary purpose is to provide tools for generating migrations and creating the database through the command line (CLI) or the Package Manager Console.
- Microsoft.EntityFrameworkCore.SqlServer (9.0.0): This package provides the SQL Server-specific provider for EF Core, meaning it allows you to use SQL Server as the database management system (DBMS) with EF Core.
.NET Core API – Models
A model refers to a class that represents the data structure or business entity used in the application. Models can serve different purposes depending on the context in which they are used. In Entity Framework Core, a model usually refers to a class that represents the data structure used for database interaction.
These classes are often referred to as entities because they represent records in a table of a database. We need to create the following folders:
Models:
- EfficiencyCalculation.cs
- Location.cs
- Reservoir.cs
- TemperatureGradient.cs
- TemperatureReading.cs
Each class refers to each table in our DB:
public class EfficiencyCalculation
{
    [Key]
    // 0 references
    public int CalculationID { get; set; }

    // 0 references
    public int HotReservoirID { get; set; }

    // 0 references
    public int ColdReservoirID { get; set; }

    // 0 references
    public double EfficiencyPercentage { get; set; }

    // 0 references
    public DateTime CalculationDate { get; set; }

    // 1 reference
    public Reservoir HotReservoir { get; set; }

    // 1 reference
    public Reservoir ColdReservoir { get; set; }
}
Now, we need to create the DB Context class. This class will handle the connection between the API and SQL Server:
public class ThermalEfficiencyDbContext : DbContext
{
    // 0 references
    public ThermalEfficiencyDbContext(DbContextOptions<ThermalEfficiencyDbContext> options) : base(options) { }

    // 0 references
    public DbSet<Reservoir> Reservoirs { get; set; }

    // 1 reference
    public DbSet<EfficiencyCalculation> EfficiencyCalculations { get; set; }

    // 0 references
    public DbSet<Location> Locations { get; set; }

    // 0 references
    public DbSet<TemperatureReading> TemperatureReadings { get; set; }

    // 1 reference
    public DbSet<TemperatureGradient> TemperatureGradients { get; set; }
}
Database Connection
Now, we need to configure the DB connection using the appSettings.json and program.cs files:
{
  "ConnectionStrings": {
    "ThermalEfficiencyDb": "Server=LOCALHOST;Database=ThermalEfficiencyDB;TrustServerCertificate=True;Trusted_Connection=True;MultipleActiveResultSets=true"
  }
}
It will be necessary to update the server’s name, in this case, with your local host server. You can take it from the SQL Server window connection. The program.cs file will handle the required middleware for multiple features in our .Net core project. In this case, we will add the DbContext configuration, referring to our connection string:
// Register DbContext with SQL Server configuration
builder.Services.AddDbContext<ThermalEfficiencyDbContext>(options =>
                                       options.UseSqlServer(builder.Configuration.GetConnectionString("ThermalEfficiencyDb"))
);
.NET Core API – Controllers
A controller is a class that defines the actions that can be performed in response to a user’s request. These actions are typically methods within the controller class that handle specific HTTP requests (GET, POST, PUT, DELETE, etc.).
A controller is responsible for:
- Receiving HTTP requests
- Interacting with the model (database, business logic)
- Returning a response, typically by rendering a view or returning data (e.g., JSON or XML)
We need to create the following folders and controllers:
Controllers:
- EfficiencyCalculationsController.cs
- TemperatureGradientsController.cs
Inside each file, we will need to create a method that returns a SQL Query result. This query is generated via LINQ:
[HttpGet]
// 0 references
public async Task<ActionResult<IEnumerable<EfficiencyCalculation>>> GetEfficiencyCalculations()
{
    var efficiencyCalculations = await _context.EfficiencyCalculations
        .Include(e => e.HotReservoir)
        .Include(e => e.ColdReservoir)
        .ToListAsync();

    return Ok(efficiencyCalculations);
}
.NET Core API – Migrations
Migrations are a structured and repeatable way to manage and apply changes to the database schema over time. They allow you to evolve your database schema as your application model (your C# classes) changes without having to manually update the database each time.
How do Migrations Work on EF Core?
When you start with an empty database, you define your models (e.g., User, Product) and create a DbContext. At this point, you have a “model” (C# code), but no corresponding database schema. Migrations help bridge this gap. In this case, we manually created our database, so it’s not necessary to run any migration. But it is nice to know about it.
Migrations commands:
The command dotnet ef migrations add InitialCreate, is used in Entity Framework Core (EF Core) to generate a new migration. Migrations in EF Core help manage database schema changes over time, especially in a code-first approach where the database schema is generated based on your C# models (classes).
The command dotnet ef database update is used in Entity Framework Core (EF Core) to apply migrations to the database. When you run this command, EF Core checks the migrations that have been added to your project but have not yet been applied to the database, and it executes them to bring the database schema up to date with the model in your code.
.NET Core API – Testing the API
Once the API is ready, you can test it by pressing the “▶️ http” run button. Once the API is ready, a Swagger window will be displayed:

Swagger is a popular framework used for documenting and testing RESTful APIs. It provides a set of tools and specifications that help to visualize and interact with APIs. Another way to test your API, is using Postman.
Postman is a popular API development and testing tool that is widely used by developers for building, testing, and debugging RESTful APIs (and other types of APIs such as SOAP and GraphQL).
You can use the desktop version or the web version. For the web version, you’ll need to accept and install the desktop agent, to give access to postman for local requests. You’ll have to create your Get methods with the same name as your controllers:

If everything is ok, you’ll see a JSON response like this:
{
  "latitude": 12.301086489092953,
  "longitude": 147.15453193953476
},
"startReading": {
  "readingID": 1,
  "locationID": 1,
  "temperatureCelsius": 1.0531654058146422,
  "measurementTime": "2024-12-24T00:10:00",
  "location": {
    "locationID": 1,
    "locationName": "Location_1",
    "latitude": 12.301086489092953,
    "longitude": 147.15453193953476
  }
}
Angular Project
This project will make the HTTP requests to our API, the response will be mapped and displayed with Lightning Chart JS. To create a new project, we need to open Visual Studio Code. Select a folder that will contain the project and open a new terminal.
If you have not installed Angular, you’ll need to execute the following command:
npm install -g @angular/cli
Now, we will create the new Angular project:
ng new ThermalEfficiencyClient
Install Lightning Chart JS:
npm i @arction/lcjs
npm i @arction/xydata
Set Up the Angular Service to Fetch Data
We will need to create a service that handles HTTP requests to the TemperatureGradients and EfficiencyCalculations API in our .NET Core application.
Generate a Service
In your Angular project, generate a service that will fetch the temperature gradient data:
ng generate service thermal-efficiency
This will generate a service file thermal-efficiency.service.ts inside the src/app folder.

Inside the service file, we will import the HttpClient package. Now we will be able to make http requests:
import { Injectable } from '@angular/core';
import { HttpClient } from '@angular/common/http'; // Import
import { Observable } from 'rxjs';

@Injectable({
  providedIn: 'root',
})
export class ThermalEfficiencyService {
  constructor(private http: HttpClient) { }

  // Method to fetch temperature gradients from the API
  getTemperatureGradients(): Observable<any> {
    return this.http.get<any>('/api/TemperatureGradients');
  }

  getEfficiencyCalculations(): Observable<any> {
    return this.http.get<any>('/api/EfficiencyCalculations');
  }
}
The API path refers to the proxy.conf.json file:

"/api": {
  "target": "http://localhost:5299",
  "secure": false
}
In this way, we don’t need to set this value in every request in the entire project. If you’re running your Angular app and the .NET Core API on different ports during development (e.g., Angular runs on http://localhost:4200 and the API runs on http://localhost:5000), you may run into issues with CORS (Cross-Origin Resource Sharing).
To avoid CORS issues, you can set up a proxy to forward requests from the Angular application to the .NET Core API. In angular.json, find the “serve” options and add the proxyConfig option to use the proxy configuration:
"serve": {
  "builder": "@angular-devkit/build-angular:dev-server",
  "options": {
    "proxyConfig": "proxy.conf.json"
  }
},
LightningChart JS Chart Components
We need to use the following command ng generate component component-name. In component name, we will assign the chart name that we need to create. The result will be like this:

We don’t need to create each file manually, and these components will be added to the app component imports. Important! For the latest versions of Angular, it is necessary to specify for each component, if they are standalone, otherwise, it may generate problems with angular imports:
@Component({
  selector: 'app-temperature-gradient-chart',
  templateUrl: './temperature-gradient-chart.component.html',
  styleUrls: ['./temperature-gradient-chart.component.css'],
  standalone: false,
})
Now we will configure our charts. I will explain only one chart, but the logic applies to the second chart.
- CSS File: We need to specify the height of the DIV component as
div { height: 350px;}
- HTML File: We need to create a DIV component; this component will work as a container for our chart. The id property will help to assign the DIV to the chart. The value can be different, this is just a random value that I used:
<div [id]="500"></div>
- TS File: This file will contain the chart component. We need to import all required packages as:
import { AfterViewInit, Component, Input, OnChanges, OnDestroy } from '@angular/core';
import { lightningChart, AxisTickStrategies, Themes, ChartXY, emptyFill } from '@arction/lcjs';
The selector property will help us to import the component inside other components via HTML:
@Component({
  selector: 'app-temperature-gradient-chart',
  templateUrl: './temperature-gradient-chart.component.html',
  styleUrls: ['./temperature-gradient-chart.component.css'],
  standalone: false,
})
The gradients variable will contain all our data from the HTTP request. The array object will be sent as parameter in the app component:
@Input() gradients: any[] = [];

chart!: ChartXY;
constructor() { }
The chart will be constructed once the view is initialized. Important! The license string can be obtained via Lightning Chart support. You can get a trial version for testing:
ngAfterViewInit() {
    setTimeout(() => {
      if (this.calculations && this.calculations.length > 0)
      {
        console.log('Using calculations in ngAfterViewInit:', this.calculations);
        let license = 'REPLACE WITH LICENSE'

        // Create a XY Chart.
        this.reservoirsChart = lightningChart({license: license})
        .ChartXY({
          theme: Themes.cyberSpace,
            container: '400',
        })
        .setTitle('')
Now, we need to add the license to the LightningChart object. We need to specify the XY type and assign its container (html div). We Use a 3000ms delay (setTimeOut), to defer execution to the next change detection cycle. We need to set the tick strategy to the X-axis:
this.chart.getDefaultAxisX()
.setTickStrategy(AxisTickStrategies.DateTime)
Now, we need to add the line series:
const startReadingSeries = this.chart
    .addPointLineAreaSeries({ dataPattern: 'ProgressiveX' })
    .setName('Start Reading')
    .setAreaFillStyle(emptyFill);

const endReadingSeries = this.chart
    .addPointLineAreaSeries({ dataPattern: 'ProgressiveX' })
    .setName('End Reading')
    .setAreaFillStyle(emptyFill);
Adding multiple line series to the chart
The gradients array object, will contain the JSON response of the API, so we just need to map the nodes we want to assign to X and Y axes:
const startReadingData = this.gradients.map(item => ({
  x: new Date(item.startReading.measurementTime).getTime(),
  y: item.startReading.temperatureCelsius
}));

const endReadingData = this.gradients.map(item => ({
  x: new Date(item.endReading.measurementTime).getTime(),
  y: item.endReading.temperatureCelsius
}));
We need to specify the range of the chart, so we just need to take the minimum and maximum value of those data sets:
let minVal = Math.min(...startReadingData.map(point => point.y));
let maxVal = Math.max(...endReadingData.map(point => point.y));

// Setup view nicely.
this.chart.getDefaultAxisY().setScrollStrategy(undefined).setInterval({ start: minVal, end: maxVal, stopAxisAfter: false });
To finalize, we just need to add the data sets to each line series, add the legend box to the chart and that’s it!
startReadingSeries.add(startReadingData);
endReadingSeries.add(endReadingData);

this.chart.addLegendBox().add(this.chart);
Using LightningChart JS Chart
Inside the app.component, we will make the requests to our API:
ngOnInit(): void {
  this.fetchGradients();
  this.fetchEfficiency();
}
Once the app is initialized, those methods will be executed:
fetchEfficiency() {
  this.ThermalEfficiencyService.getEfficiencyCalculations().subscribe(
    (data) => {
      this.calculations = data;
    },
    (error) => {
      console.error('Error fetching efficiency Calculations:', error);
    }
  );
}

fetchGradients() {
  this.ThermalEfficiencyService.getTemperatureGradients().subscribe(
    (data) => {
      this.gradients = data;
    },
    (error) => {
      console.error('Error fetching temperature gradients:', error);
    }
  );
}
Those methods will run the service methods we created before. Once the subscription is successful, the response will be stored in “calculations” and “gradients” array objects:
gradients: any[] = [];calculations: any[] = [];
Inside the HTML file, we will import our components via selectors:
<div style="text-align:center; margin-top: 20px;">

    <h1 style="color: aliceblue;">Temperature Gradients</h1>
    <app-temperature-gradient-chart [gradients]="gradients"></app-temperature-gradient-chart>

    <h1 style="color: aliceblue;">Thermal Efficiency</h1>
    <app-thermal-efficiency-chart [calculations]="calculations"></app-thermal-efficiency-chart>

</div>
As you can see, we are sending the array of objects as parameters. The components will receive those objects, and the mapping process that we saw before will be executed. The Angular project is done!✅
Conclusion
Using .NET Core for Web APIs, SQL Server as the database, and Angular for the front-end is like having a “dream team” in development for building a thermal efficiency analysis dashboard. .NET Core provides a super-fast, lightweight, and cross-platform framework, ideal for handling APIs with top-notch performance and solid security for your thermal efficiency analysis dashboard.
SQL Server pairs beautifully with .NET Core, offering power and advanced features for data management without complicating integrations in the context of a thermal efficiency analysis dashboard. And Angular… well, it’s the perfect combo to bring the front-end of a thermal efficiency analysis dashboard to life, delivering a smooth and modern user experience.
Together, you have a robust and scalable solution, perfect for both large and small applications, including a comprehensive thermal efficiency analysis dashboard. Plus, working with these technologies makes development more efficient: you have powerful tools, a massive community, and top-notch documentation for creating a sophisticated thermal efficiency analysis dashboard.
LightningChart JS takes your visualizations to the next level with incredibly fast, interactive, and easy-to-implement charts, crucial for a dynamic thermal efficiency analysis dashboard. What makes Lightning Chart JS the best choice for graphs is its ability to handle massive datasets without compromising performance, essential for detailed thermal efficiency analysis dashboard insights.
It’s ideal for applications that require real-time visualizations or need to process large amounts of data seamlessly, such as a real-time thermal efficiency analysis dashboard. Moreover, its intuitive API allows developers to integrate advanced charts in just minutes for their thermal efficiency analysis dashboard.
Its modern and customizable design ensures that the charts are not only functional but also visually impressive within the thermal efficiency analysis dashboard. I hope this article was very helpful!
If you’re an experienced developer, this project might have seemed very basic, but if you’re just starting out with a project that requires these tools, I hope it serves as an introduction to this type of development for a thermal efficiency analysis dashboard. Thank you!
Continue learning with LightningChart
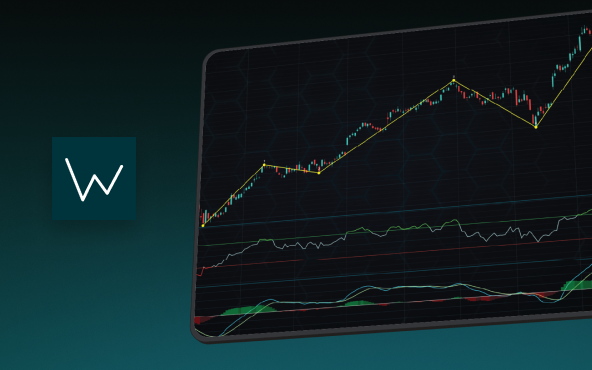
Elliott Wave Theory in Trading
Financial markets often appear chaotic, but many traders believe that price movements follow recurring patterns driven by human psychology. One of the most influential approaches based on this idea is the Elliott Wave Theory. Developed nearly a century ago, it remains one of the most widely studied methods of technical analysis.
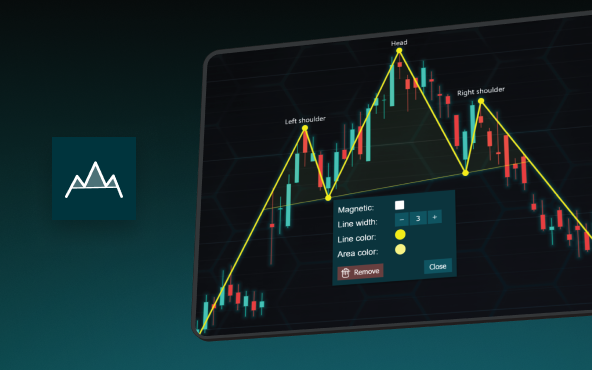
The Head and Shoulders Pattern in Technical Analysis
The Head and Shoulders Pattern in Technical Analysis The Head and Shoulders Pattern in Technical Analysis The Head and Shoulders pattern is one of the most recognized and widely used chart patterns in technical analysis. It is considered a reliable reversal pattern...
Best Telerik Charts Alternative in 2026: GPU Performance for WPF, WinForms, and Web
Telerik from Progress is a comprehensive UI component suite covering WPF, WinForms, ASP.NET, Blazor, and JavaScript. The charting components: RadChartView for WPF and WinForms, and Kendo UI Charts for web and Blazor, arrive bundled with the suite purchase. For teams...


If you have any questions, feel free to contact us!
©LightningChart Ltd 2026. All rights reserved.