


LightningChart JSCreate a JavaScript Refreshing Spectrum Chart with NodeJS, TypeScript & LightningChart
TutorialEasily create a high-performance & interactive Refreshing Spectrum chart with LightningChart JS.
Written by a human | Updated on April 10th, 2025
JavaScript Refreshing Spectrum Chart
Hello again, this time I bring a quick but helpful tutorial on how to create a JavaScript refreshing spectrum chart. A spectrum chart is commonly used in reading and plotting electromagnetic or radiation data.
In today’s example, we will make a representation of a spectrogram within a line graph. Unlike a spectrogram chart, which updates the data obtained within a dashboard that slides from right to left or vice versa, the line chart will update the values within a static chart. The values will update quickly so it will generate an “electric” effect, representing the magnitude of the spectrum.
Project Overview
Feel free to interact with the JavaScript refreshing spectrum line chart you’ll create. Also, make sure to download the project to follow the tutorial.
 Download the project to follow the tutorial
Local Setup
1. Download the initial template that will help us get started with this example.
2. After downloading the template, you’ll see a file tree like this:

Note: If you are not yet familiar with projects like Node JS; inside this JavaScript Refreshing Spectrum chart project, you will find a file called: package.json. The package.json file will contain a list of all the dependencies or libraries that are necessary to run the project. This is done with the goal of not having to download a project with all its dependencies stored in the “node_modules” folder.
3. Open a new terminal and run the npm install command:
As usual in a NodeJS project, you need to run the npm install command. That would be everything for our initial setup. Let’s code.
CHART.ts
Inside this file, we will have all the logic needed to create our chart, configure animations, and format the data.
1. Declare the constant lcjs that will refer to our @arction/lcjs library.
2. Extract required classes from lcjs
// Extract required parts from LightningChartJS.
const {
  lightningChart,
  AutoCursorModes,
  Themes
} = lcjs;

const { createSpectrumDataGenerator } = require("@arction/xydata");
3. Creating the chart object
const chart = lightningChart().ChartXY({
  theme: Themes.darkGold,
})
  .setTitle('Spectrum Line Chart')
  .setAutoCursorMode(AutoCursorModes.disabled)
Let’s review the properties:
- setTitle: Text label that will be shown as the title of the chart.
- setAutoCursorMode: Set chart AutoCursor behavior, by selecting a preset option from AutoCursorModes. Read more in the setAutoCursorMode documentation.
- Theme: LightningChart JS features several color themes. You can access them with the Themes property. Notice that the color theme must be specified when you’re creating the chart. In case you do it later, the chart might be destroyed, and you’ll have to recreate it. Read more in the Themes documentation.
chart.getDefaultAxisY()
  .setScrollStrategy(undefined)
.setInterval(0.09, .9)- getDefaultAxisY: Gets the Y axis.
- setScrollStrategy: Specify ScrollStrategy of the Axis. This decides where the Axis scrolls based on the current view and series boundaries.
- setInterval: Set axis scale interval.
4. Creating the LineSeries object
This is a method for adding a new LineSeries to the JavaScript refreshing spectrum chart. This series type visualizes a list of Points (pair of X and Y coordinates), with a continuous stroke. LineSeries is optimized for massive amounts of data.
- A static data set in the tens of millions range is rendered in a matter of seconds.
- With streaming data, even millions of data points can be streamed every second, while retaining an interactive document.
You can read more in the LineSeries documentation.
5. Creating the Spectrum Data
The class [CreateSpectrumDataGenerator], will generate several spectrum data sets that will be displayed one after the other.
createSpectrumDataGenerator()
  .setSampleSize(1024)
  .setNumberOfSamples(2)
  .setFrequencyStability(2)
  .setVariation(2)
  .generate()
  .toPromise()
.then(dataSet => {- setSampleSize: Sets the maximum size of the line in the chart. See the X-axis as example:

- setNumberOfSamples: Returns a new Data generator with the new numberOfSamples.
- setFrquencyStability: Returns a new Data generator with the new frequencyStability. Frequency drifting also depends on Variation, which affects especially low-Frequency Stability amounts.
- setVariation: Returns a new Data generator with the new variation. Variation between adjacent points in range 0…100.
6. Adding new Data Set to the JavaScript refreshing spectrum chart
DataSet contains many samples. Configuration code that will change the displayed sample once in each frame:
.then(dataSet => {
    // dataSet contains many samples. Setup code that will change displayed sample once every frame.
    let iSample = 0
    const nextSample = () => {
      iSample = (iSample + 1) % dataSet.length
      const sample = dataSet[iSample]
      // Sample only contains Y values, use `addArrayY` to automatically generate X coordinate for each data point.
      series.clear().addArrayY(sample)
      requestAnimationFrame(nextSample)
    }
    nextSample()
The sample contains only Y values, use [addArrayY] to automatically generate the X coordinate for each data point.
Final Application
To visualize the final JavaScript refreshing spectrum chart application, run the npm start command. It will give you the local host URL path to visualize the chart in your browser.

Omar Urbano
Software Engineer
Continue learning with LightningChart
Elliott Wave Theory in Trading
Financial markets often appear chaotic, but many traders believe that price movements follow recurring patterns driven by human psychology. One of the most influential approaches based on this idea is the Elliott Wave Theory. Developed nearly a century ago, it remains one of the most widely studied methods of technical analysis.
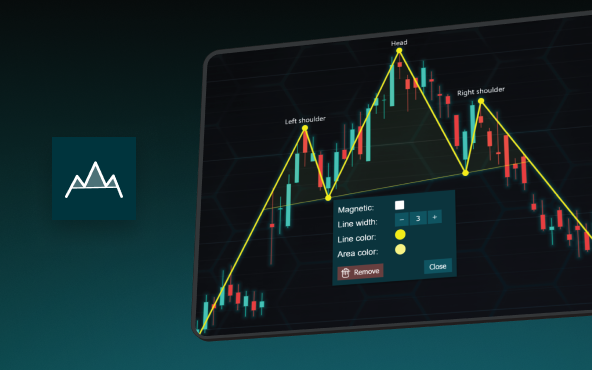
The Head and Shoulders Pattern in Technical Analysis
The Head and Shoulders Pattern in Technical Analysis The Head and Shoulders Pattern in Technical Analysis The Head and Shoulders pattern is one of the most recognized and widely used chart patterns in technical analysis. It is considered a reliable reversal pattern...
Best Telerik Charts Alternative in 2026: GPU Performance for WPF, WinForms, and Web
Telerik from Progress is a comprehensive UI component suite covering WPF, WinForms, ASP.NET, Blazor, and JavaScript. The charting components: RadChartView for WPF and WinForms, and Kendo UI Charts for web and Blazor, arrive bundled with the suite purchase. For teams...


If you have any questions, feel free to contact us!
©LightningChart Ltd 2026. All rights reserved.