


LightningChart JSStep-by-step Guide to Custom Annotations JavaScript Charts
TutorialA walkthrough tutorial on creating custom annotations JavaScript charts.
Written by a human | Updated on April 23rd, 2025
Custom Annotations JavaScript Charts
Lightning Chart JS allows the creation of line charts by using XY charts. Line charts work on two axes where each axis can have its own settings, e.g., tick strategy, intervals, and mouse interactions. LC JS XY charts require a series of lines added to the XY target.
Line series may contain many data points that require two values: the X-value and Y-value. In this exercise, we will use randomly generated for the data points but in a real implementation, you would need a JSON object where each node contains the X-Y values.
The LC JS latest version allows us to add annotations, or custom PNG or JPG images as markers. We can affect the visual styles of these markers such as the font size and style, colors, cursor style, borders, etc. Also, LC JS allows us to manipulate these markers along the UI, for example, allowing the user to drag and place the markers at a desired coordinate within the chart.
A line chart gets its name because of how the data points are joined by lines. Usually, the shape of the data points is lost with the union of each line, generating a single line through the Cartesian plane.
The Cartesian plane usually is composed of two axes (X-Y). Depending on the values of each data point, some can be located higher than others. When these data points are joined by lines, we can see variations that help identify abrupt changes in a period or interval. This latter idea is the analysis of line series.
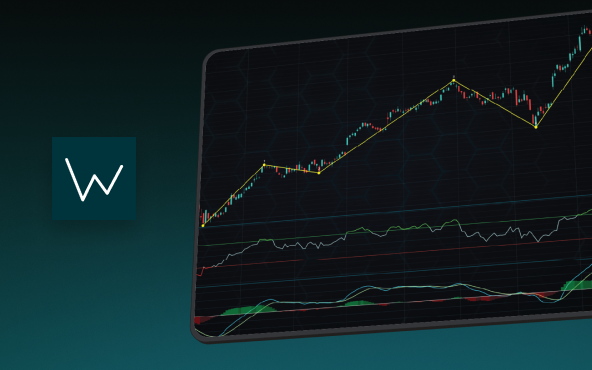
Line charts are often used in financial studies since they are extremely useful for spotting immediate variations thanks to the unions of each point. The more vertical the line, the stronger the variation between those values (peaks). A clear example here:

Line charts can also contain more than one series of data. This allows comparing more than one case scenario at a time. For instance, the performance of 3 currencies over the last two years, where each currency would have its data allocated in its own series.
Now, depending on the number of data points in the series, the line will have wider or smaller intervals. For example, when studying audio or vibration signals, the intervals are very short, generating a more aggressive line:

Project Overview
This article will show a brief application development exercise with LightningChart JS based on XY line charts. The overall objective of this exercise is to implement markers with personalized images.
This custom implementation will help us track and locate key data points for further analysis. We have previously worked several times with line charts, so I recommend looking at each one for further learning since we implement unique functionalities in each.
Note that the most recent version of LightningChart JS can be found in the LC JS documentation. But let’s now start with a brief introduction to line charts in data visualization.
 Download the project to follow the tutorial
Template Setup
1. Download the template provided to follow the tutorial.
2. After downloading the template, you’ll see a file tree like this:

3. Open a new terminal and run the npm install command
CHART.ts
We recommend you use and update to the most recent versions of LightningChart JS and XYData. This is because some LightningChart JS tools do not exist in previous versions. In the project’s package.json file you can find the LightningChart JS dependencies:
"dependencies": {
"@arction/lcjs": "^5.1.0",
"@arction/xydata": "^1.4.0",
"webgl-obj-loader": "^2.0.8",
}
1. Importing libraries
We will start by importing the necessary libraries to create our chart.
// Import LightningChartJS
const lcjs = require('@arction/lcjs')

const { lightningChart, Themes, emptyFill, AxisTickStrategies, AxisScrollStrategies, emptyLine, IndividualPointFill, ColorHEX } = lcjs
2. Add license key (free)
Once the LightningChart JS libraries are installed, we will import them into our chart.ts file. Note you will need a trial license, which is free. We would then add it to a variable that will be used for creating the custom annotations JavaScript Chart object.
let license = undefined
try {
    license = 'xxxxxxxxxxxxx'
} catch (e) {}
3. Properties
const imgFlag = new Image()
imgFlag.crossOrigin = ''
imgFlag.src = 'https://lightningchart.com/js-charts/interactive-examples/examples/assets/0055/flag.png'
–Image: In this case, we will add an image provided by LightningChart. This will be the image (or icon) that we will use as the custom markers.
.ChartXY({
        theme: Themes.turquoiseHexagon,
    })
– Theme: defines the look and feel of your JS treemap chart. Note that you must specify the color theme of the chart components beforehand.
.setTitle('Drag different colored annotations from left')– setTitle: sets the name at the top of the chart.

4. Setting up channels
channels = channels.map((ch, i) => {
    const iStack = channels.length - (i + 1)
    const axisY = chart
        .addAxisY({ iStack })
        .setDefaultInterval({ start: 0, end: 1 })
        .setMargins(iStack > 0 ? 15 : 0, iStack < channels.length - 1 ? 15 : 0)
        .setMouseInteractions(false)
        .setChartInteractions(false)
In the array called “channels”, we have a specific number of channels as 3. Therefore, we will create a series for each channel. We will have to use a loop to speed up the series creation process, relying on the index of each one so as not to create exact copies.
- addAxisY: Add a new Y-Axis to the Chart.
- setDefaultInterval: Set Axis default interval. This does the same as the setInterval method but is also applied again whenever fit is triggered, or the “zoom to fit” user interaction is triggered. Intended to be used in use cases that set an Axis interval nicely at the start of the application. This method also allows interval specification as a callback function, allowing the applied default interval to be based on the range of data or current axis interval.
- setMargins: Add space at either end of the axis, without affecting the relative size of the Axis.
- setMouseInteractions: Set mouse interactions enabled. Implementations should update the mouse interactions of any Shapes they may contain here.
- setChartInteractions: Set all states of chart mouse interactions on the axis at once.
5. Setup Axes
const series = chart
        .addPointLineAreaSeries({ axisY, dataPattern: 'ProgressiveX' })
        .setAreaFillStyle(emptyFill)
        .setMaxSampleCount(100_000)
    return { 'label':ch.label,axisY, series }
})
We will create the series in the same loop where the channels were created. Each series will be created based on the channels (Y-axes) and a pattern for the X axis. By adding series, we can visualize any combination of Lines, Points, and Area filling series. The series property also supports different preprocessing options including step, spline, and disabled.
Compared to the old XY series feature, this new series feature has important performance optimizations. It is significantly more memory-efficient and can handle much more data more efficiently than the older series versions.
The new series introduces drafts for new end-user APIs for many purposes, like more logical automatic data cleaning configuration, modifying visualization type during run-time, etc. In total, the new series introduces over 20+ distinct improvements over the old XY data visualization features.
const timeAxis = chart
    .getDefaultAxisX()
    .setTickStrategy(AxisTickStrategies.Time)
    .setScrollStrategy(AxisScrollStrategies.progressive)
    .setDefaultInterval((state) => ({
        end: state.dataMax ?? 0,
        start: (state.dataMax ?? 0) - 15_000,
        stopAxisAfter: false,
    }))
Now, we need to set up the X-axis. Even though our chart has 3 channels, all the channels share the same X-axis and thus, we need to configure it only once. With the getDefaultAxisX function, we will have access to the X-axis. The setTickStrategy function defines the positioning and formatting logic of Axis ticks as well as the style of created ticks.
Since our chart will be based on periods, we will assign the time and date strategy for the Y-axis and the numeric for the X-axis since we want to measure the data point in hours. The setInterval property requires numerical values and we will have to convert the start date and end date to milliseconds using the getTime() function. There are several strategies that you can use to achieve this:
Drag & Drop Custom Annotations
const annotationMenu = document.createElement('div')
chart.engine.container.append(annotationMenu)
annotationMenu.style.position = 'absolute'
annotationMenu.style.display = 'flex'
annotationMenu.style.flexDirection = 'row'
annotationMenu.style.margin = '10px'
Now, we will create the HTML container (DIV) to display our markers and allow the drag-and-drop function within the chart UI.
- Engine: It refers to the interface for the end-user API of the LCJS engine. It also provides some useful capabilities over the canvas. The canvas may contain a single chart or a Dashboard with several charts.
The container will display the HTML component. This will maintain the style properties we need.
;[
    { color: '#ff0000', label: 'Red' },
    { color: '#00ff00', label: 'Green' },
    { color: '#0000ff', label: 'Blue' },
].forEach((item) => {
    const option = document.createElement('span')
    annotationMenu.append(option)
    option.style.height = option.style.width = '20px'
    option.style.fontFamily = 'Segoe UI'
    option.style.backgroundColor = item.color
    option.style.marginRight = '10px'
    option.style.border = `solid ${chart.getTheme().isDark ? 'white' : 'black'} 1px`
    option.style.borderRadius = '5px'
    option.style.cursor = 'pointer'
    option.draggable = true
    option.ondragstart = (event) => {
        event.dataTransfer.setData('text', JSON.stringify(item))
    }
})
Now we will create the custom PNG/JPG markers, and the setup will be almost the same for each. We must add the markers into an array and run the process inside a loop. Each marker will be created as a <span> and will be added to the container. As these are HTML elements, we can assign CSS styles including height, font, background color, and any others. To drag the custom markers into our chart, we need to initialize and set the draggable property to true.
OnDragStart: this property fires on the source object when the user starts to drag a text selection or selected object.
chart.engine.container.ondrop = (event) => {
    const item = JSON.parse(event.dataTransfer.getData('text'))
    const x = chart.translateCoordinate(event, chart.coordsAxis).x
    // Annotation is built from 2 components:
    // 1. ConstantLine (vertical line created on X axis)
    // 2. A single sample in Point series with Icon shape and individual sample colors.
    timeAxis.addConstantLine(false).setValue(x)
    pointSeries.appendSample({ x, y: 1, color: ColorHEX(item.color) })
}
You will get the X-axis coordinate when the custom marker is released onto the chart. You may recall that the timeAxis property corresponds to the X-axis to which you will add a ConstantLine highlighter using the addConstantLine property. Finally, add the marker as a new data point to the series. This will have the value of the X coordinate and the value of Y will be equal to 1 which will be the maximum value of the Y-axis. Finally, run the NPM START command on a new terminal to open the project on your local host.
Conclusion
We have reached the end of this article. As I mentioned at the beginning, we have previously worked with line charts using both LightningChart JS and Lightning Chart .NET. In this exercise, we only did a variant of how to create channels and series of lines, but these can be created one by one or in the dynamic way that best suits your requirements.
The real goal of this chart custom markers implementation project was to show you how to implement markers to the XY chart type. To create markers, we will need the Engine interface that LC JS offers us. This interface will allow us to work with HTML components that will be part of the user interface. The markers will need a PNG or JPG image and at least one color to help us differentiate them.
The Engine interface will also help us drag and position our custom markers by using the ondrop event provided by the Engine container. Within this event, the actions will be executed when we drop our marker as the marker is just an HTML element that has a drag-and-drop animation.
The marker that is positioned on the chart is a new data point created and added to our X axis. This point will obtain the coordinate of the X-axis on which it was dropped, and the maximum value of the Y-axis will be assigned to it to position it at the top of the chart.
To create the vertical indicator line, the addConstantLine function is used. A rather creative solution, but quite useful, since we can create HTML controls that can help us with indicators for the chart. Thank you!

Omar Urbano
Software Engineer
Continue learning with LightningChart
Javascript Charting Library comparison 2026
Every year someone publishes a listicle of JavaScript charting libraries. They screenshot a demo, note the GitHub stars, paste in the npm install command, and call it a day. Then you follow their recommendation, get six months into your project, and discover that your...
Visualizing 10 Million Data Points in the Browser (2026): The Technical Deep-Dive
Ten Million Data Points in the Browser: How WebGL Makes Mass Datasets Interactive Ten million data points. That number used to mean a database problem, not a front-end problem. Now research teams want to explore it interactively in a browser. Trading desks want...
Elliott Wave Theory in Trading
Financial markets often appear chaotic, but many traders believe that price movements follow recurring patterns driven by human psychology. One of the most influential approaches based on this idea is the Elliott Wave Theory. Developed nearly a century ago, it remains one of the most widely studied methods of technical analysis.


If you have any questions, feel free to contact us!
©LightningChart Ltd 2026. All rights reserved.