


LightningChart .NETHow to Easily Create an Audio Output Signal Reader
TutorialDevelop your own audio output signal reader app with LightningChart .NET library
Written by a human | Updated on April 10th, 2025
What is an Audio Output Signal Reader?
An audio output signal reader is a device or software that reads and processes the audio output signal from an audio source and outputs it in a readable or usable format, such as an audio file or a visual representation of the signal.
The purpose of an audio output signal reader can vary, including audio signal analysis, audio file conversion, or audio signal routing and processing. Audio is an essential aspect of modern technology, and the ability to accurately read and interpret audio output signals is crucial for various applications.
From recording studios to sound reinforcement systems, audio output signal readers play a vital role in ensuring the quality and integrity of audio signals. In this blog, we will explore how to create an audio output signal reader, how it works, and its implementation using LightningChart .NET.
Whether you’re a sound engineer, a musician, or simply someone who wants to know more about audio technology, this blog will provide a comprehensive tutorial for creating an audio output signal reader high-performance application. So sit back and let’s dive into coding an audio output signal reader app!
Project Overview
Today, we are embarking on a new project to create a straightforward and user-friendly .NET application that will serve as a tool for studying and analyzing audio signals.
This application will allow users to visualize the signals in real time and understand the various aspects of audio processing. Whether you are a sound engineer, musician, or simply someone who is interested in audio technology, this application will provide an easy and accessible way to learn about audio signals and their properties.
With its intuitive design and user-friendly interface, we are confident that this LightningChart .NET visualization application will become an indispensable tool for anyone studying audio signals.

 Download the project to follow the tutorial
Local Setup
For this project, we need to take in count the following requirements to compile the project.
-
OS: 32-bit or 64-bit Windows Vista or later, Windows Server 2008 R2 or later.
-
DirectX: 9.0c (Shader model 3 and higher) or 11.0 compatible graphics adapter.
-
Visual Studio: 2010-2019 for development, not required for deployment.
-
Platform .NET Framework: installed version 4.0 or newer.
Now go to the next URL and click the download button: http://lightningchart.com/net-charts/

You will be redirected to a sign in form, from then on, the process is very simple to follow. So, after confirming your email, you will have access to your own LightningChart account.

After you sign into your account, you will be able to download the SDK. This SDK will be a "free trial" version, but you will be able to use many important features.
If you download the SDK, you will have an .exe like this:

The installation will be a typical Windows process, so please continue with it until it is finished. After the installation, you will see the following programs:

- License Manager: In this application, you will see the purchase options. All the projects that you will create with this trial SDK, will be available for future developments with all features enabled.

- LightningChart .NET Interactive Examples: now you can see 100+ interactive visualizations available for WPF, WinForms, and/or UWP though today we’re working with Smith Charts.

Visual Studio Project
Now let’s work with visual studio. The main difference between using the LightningChart .NET visualizer and Visual Studio, is that we will be able to analyze and experiment with many features in the source code. In the LC visualizer, select the Audio Output Signal Reader and run the example:

In the top-right zone of the windows, you will see the following options:

For trial SDK, we will be able to use the WPF and WinForms frameworks. If you are fully related to windows forms, this option will be more comfortable. In this case I will use the Windows Presentation Foundation framework.
After clicked the framework to use, we will need to specify a folder where the project will be created:

Finally, the project will be created, and the Visual Studio will be opened and ready for execution.

Code Review
The main code will be wrapped inside MainWindow.xaml.cs. Here we will find the code for UI controls.

Inside the code we will check two methods that will create the properties that we need to draw correctly the chart.
CreateChart()
This main method will initialize many properties that are provided by the Lightning Chart .NET framework. If you checked our previous JS articles, this part will be familiar.
The great advantage here is, if you have C# knowledge, this syntax will be easier for you.
- _chart: The chart object will contain the LightningChart constructor… basically, this will contain a new instance of a chart object. The _chart object will be declared at the beginning of the class:
public partial class ExampleAudioOutputSignalReader : Window, IDisposable
    {
        // Chart control for waveform data.
private LightningChart _chart;- gridChart Children: First, the method will clear all previous grids inside the chart dashboard.
// Clear any gridChart's children.
            gridChart.Children.Clear();

            if (_chart != null)
            {
                // If a chart is already created, dispose it.
                _chart.Dispose();
                _chart = null;
            }

            // Create a new chart.
            _chart = new LightningChart();

_chart.BeginUpdate();- gridChart: refers to the Main Grid of our window.
/>
            </StackPanel>
        </Grid>
        <Grid Grid.Row="2" Name="gridChart"/>
    </Grid>
</Window>
If a previous chart was created, this will be disposed of by using the [Dispose] function. After the chart is disposed of, a new instance of LightningChart will be created.
- Chart properties:
_chart.BeginUpdate();

            _chart.Title.Text = "Switch on your speakers... audio waveform with sound device output";
            _chart.ChartName = "Waveform chart";

            _chart.ViewXY.XAxes[0].Title.Text = "Time";
            _chart.ViewXY.XAxes[0].ValueType = AxisValueType.Time;
            _chart.ViewXY.XAxes[0].AutoFormatLabels = false;
            _chart.ViewXY.XAxes[0].LabelsTimeFormat = "HH:mm.ss";
            _chart.ViewXY.YAxes[0].Title.Text = "Voltage";

            _chart.ViewXY.AxisLayout.YAxesLayout = YAxesLayout.Stacked;

_chart.ViewXY.ZoomPanOptions.WheelZooming = WheelZooming.Horizontal;- BeginUpdate(): Disables control repaints when updating the status of many properties or updating series points.
- ChartName: Name of the chart.
- ChartTitle: Text that will be displayed at the top of the chart…”Switch on your speakers…audio waveform with sound device output”.
- YAxes: We can get access to the X and Y axes by using the ViewXY property. XAxes – YAxes are lists that contain all the available axes (XY charts have by default 1 X and 1 Y). Once we get the axis object, we can configure some UI properties such as format, labels’ format, and value type.
- Axis Value Type: The value type enumerable class contains the following members:
//	Axis value type.
[Description("Axis value type.")]
public enum AxisValueType
{
	//
	// Summary:
	//		Number values.
	Number = 1,
	//
	// Summary:
	//		Time values.
	Time = 2,
	//
	// Summary:
	//		DateTime values.
	DateTime = 3,
	//
	// Summary:
	//		Map coordinates, degrees..
	MapCoordsDegrees = 4,
	//
	// Summary:
	//		Map coordinates, degrees, with N, E, S, W indication. Example: 40.446195N 79.948862W
	MapcoordsDegNESW = 5,
	//
	// Summary:
	//		Map coordinates, degrees, arc minutes and seconds, with N, E, S, W indication.
	//		Example: 40°2'13"N 9°58'2"W
	MapCoordsDegMinSecNESW = 6,
	//
	// Summary:
	//		Map coordinates, degrees, arc minutes and seconds, with N, E, S, W indication.
	//		The minute and second values are padded with zeros, if they are < 10. Example:
	//		40°02'13"N 9°58'02"W
	MapsCoordsDegPadMinSecNESW = 7,
}- Cursor Properties:
We can get access to the cursor and give properties by using the LineSeries constructor. The parameters are the ViewXY (ViewXY Class) and the X-axis to that we want to assign the cursor properties.
- Colors: Class with an extensive catalog of ARGB colors.
- AllowUserInteraction: Gets or sets whether user interaction is allowed.
- LineSeriesCursors: Adding the cursor object to the chart.
//Set playback cursor
            LineSeriesCursor cursor = new LineSeriesCursor(_chart.ViewXY, _chart.ViewXY.XAxes[0])
            {
                Style = CursorStyle.VerticalNoTracking
            };
            cursor.LineStyle.Color = Colors.White;
            cursor.AllowUserInteraction = false;
            cursor.ValueAtXAxis = 0;
            _chart.ViewXY.LineSeriesCursors.Add(cursor);

            _chart.EndUpdate();

gridChart.Children.Add(_chart);- EndUpdate(): Enables the control repaints.
PrefillAudioDataToChart()
This method will be called after CreateChart() and will execute the InitChart() method.
SignalReader.Marker[] markers = null;

            _signalReader.ReadAllData(_fileName,
                out _channelCount, out _samplingFrequency, out _audioData, out markers);

            _chart.BeginUpdate();

            //Set series count and sampling frequency
            InitChart(_channelCount, _samplingFrequency);

            for (int channel = 0; channel < _channelCount; channel++)
            {
                _chart.ViewXY.SampleDataSeries[channel].SamplesDouble = _audioData[channel];
}- _SignalReader: An instance of the SignalReader class. This class will help us to read the bits inside an audio file, in this case, a WAV file.
- ReadAllData: Returns the channel count, sampling, and audio data, by sending the location of the audio file:
_fileName = Environment.CurrentDirectory + "\\Content\\Whistle_48kHz.wav";- BeginUpdate(): Disables control repaints when updating the status of many properties or updating series points.
- InitChart(): This method will add a sample to each counted channel. It will add the name of the channel, line style, and color.
Start()
public void Start()
        {
            StartPlayback();
        }
This method will reproduce the WAV file sound. The StartPlayBack() method will read the file and reproduce it. The difference between StartPlayBack() and PrefillAudioDataToChart(), is that the first one only reproduces the sound, and the second will create the UI properties of the chart.
StartPlayBack() can be executed by clicking the [start] button:
private void buttonStart_Click(object sender, RoutedEventArgs e)
        {
            StartPlayback();
        }
We can stop the playback process by using SignalReader.StopRequest() function, also this function can be executed by the [Stop] button:
private void buttonStop_Click(object sender, RoutedEventArgs e)
        {
            buttonOpen.IsEnabled = true;
            buttonStart.IsEnabled = true;
            buttonStop.IsEnabled = false;
            _audioOutput.IsOutputEnabled = false;

            _signalReader.StopRequest();
        }
The [Open Signal File] button, will execute an “open file” function. This function will open the file explorer. After opening the file, the StartPlayBack() and PrefillAudioDataToChart() methods will be executed.
Final Application
(Turn up or activate the volume)
In conclusion, the signal reader application made with LightningChart .NET has proven to be a powerful and efficient tool for visualizing and analyzing signals. The ability to quickly and easily customize the chart appearance and the high performance of the charting engine has made this application a valuable asset for those in the signal processing industry.
With the advanced features and capabilities offered by LightningChart, the signal reader application provides a complete solution for analyzing and interpreting signals with ease. The combination of advanced technology and user-friendly design makes this application a top choice for professionals and enthusiasts alike.
This example allows us to create a signal reader in a simple way. The tool is too useful in studying audio signals. The tools provided by the ViewXY class are quite powerful and useful.
We pretty much need to focus on the visual properties of our chart, while Lightning Charts .NET takes care of giving us highly advanced functionality: from a zoom-in for high precision analysis to a precise time reading. This example may well serve as a layout, on which you can add new visual elements, with more complex functions.

Omar Urbano
Software Engineer
Continue learning with LightningChart
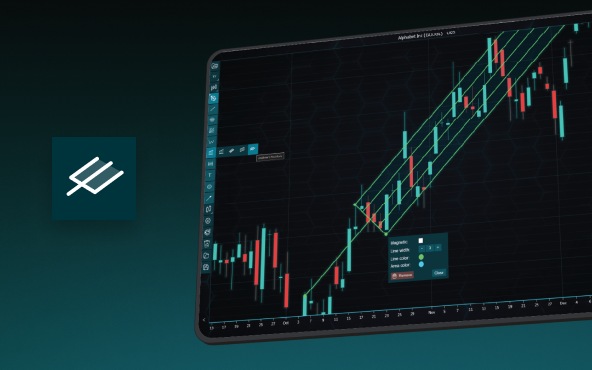
Andrews’ Pitchfork in Technical Analysis
Andrews' Pitchfork is one of the most respected technical analysis tools used by traders to identify potential support and resistance levels, trend direction, and future price paths. Developed by Dr. Alan H. Andrews, the indicator is based on the principle that prices...
React Charting Performance
Here's a scenario that plays out across development teams every few months. Someone builds a React dashboard, picks Recharts or Victory because they're popular, the devs love them, and the first demo looks great. Then the dataset gets bigger. Or the data starts...

Javascript Charting Library comparison 2026
Every year someone publishes a listicle of JavaScript charting libraries. They screenshot a demo, note the GitHub stars, paste in the npm install command, and call it a day. Then you follow their recommendation, get six months into your project, and discover that your...


If you have any questions, feel free to contact us!
©LightningChart Ltd 2026. All rights reserved.