


LightningChart .NETTutorial How to Create an Audio Input Spectrogram Chart with .NET Charts
TutorialStep-by-step tutorial how to create your own waveform spectrogram chart for audio & frequencies analysis.
Written by a human | Updated on April 10th, 2025
Audio Input Spectrogram Chart
LightningChart .NET is a powerful data visualization tool that provides advanced charting capabilities for the .NET framework. One of its key features is the spectrogram chart, which is a visual representation of frequency content over time. Spectrograms are commonly used in the fields of audio and signal processing, where they are used to analyze and understand complex signals and audio signals, including music and speech.
LightningChart .NET’s spectrogram chart is a highly advanced and feature-rich tool that provides everything you need to create professional-quality spectrograms quickly and easily. With its intuitive and user-friendly interface, you can easily create stunning spectrogram charts that are both accurate and visually appealing.
Whether you’re working with audio signals, or need to analyze and visualize other types of signals, LightningChart .NET has you covered. The spectrogram chart provided by LightningChart .NET is fully customizable and comes packed with advanced features, such as real-time updates, customizable color maps, and multiple display modes.
With support for large data sets, real-time updates, and the ability to seamlessly integrate with other types of data, LightningChart .NET’s spectrogram chart is the perfect tool for anyone who needs to create high-quality spectrogram charts and diagrams in the .NET framework.
So if you’re looking for a powerful and versatile spectrogram charting solution, look no further, and let’s begin this tutorial 🙂
Project Overview
An audio input charting component, as the name suggests, is a specialized tool designed to capture and display waveform data from sound devices, such as microphones or line-in inputs. This type of component is essential for those who need to visualize the real-time waveform data of audio signals in a graphical format.
The captured waveform data is then plotted on waveform graphs, allowing users to easily analyze and understand the complex signals and audio signals, including music and speech. The use of audio input charting components has become increasingly common in the fields of audio and signal processing, as they provide a simple and effective way to visualize the frequency content of signals over time.
With the ability to display real-time waveform data in an easy-to-understand graphical format, audio input charting components are a valuable tool for engineers, researchers, and designers who need to analyze and understand the behavior of audio signals. Now, take a look at the audio input charting component we will create.
(Turn up or activate the volume)
Extract from Mozart’s 39th Symphony, 4th movement, allegro, finale.
 Download the project to follow the tutorial
Local Setup
For this project, we need to take in count the following requirements to compile the project.
-
OS: 32-bit or 64-bit Windows Vista or later, Windows Server 2008 R2 or later.
-
DirectX: 9.0c (Shader model 3 and higher) or 11.0 compatible graphics adapter.
-
Visual Studio: 2010-2019 for development, not required for deployment.
-
Platform .NET Framework: installed version 4.0 or newer.
Now go to the next URL and click the download button: http://lightningchart.com/net-charts/

You will be redirected to a sign in form, from then on, the process is very simple to follow. So, after confirming your email, you will have access to your own LightningChart account.

After you sign into your account, you will be able to download the SDK. This SDK will be a "free trial" version, but you will be able to use many important features.
If you download the SDK, you will have an .exe like this:

The installation will be a typical Windows process, so please continue with it until it is finished. After the installation, you will see the following programs:
The installation will be a typical Windows process, so please continue with it until it is finished.
After the installation, you will see the following programs:

- License Manager: In this application, you will see the purchase options. All the projects that you will create with this trial SDK, will be available for future developments with all features enabled.

- LightningChart .NET Interactive Examples: now you can see 100+ interactive visualizations available for WPF, WinForms, and/or UWP though today we’re working with Smith Charts.

Visual Studio Project
Now let’s work with visual studio. The main difference between using the LightningChart .NET visualizer and Visual Studio, is that we will be able to analyze and experiment with many features in the source code. In the LC visualizer, select the Audio Input Spectrogram Chart and run the example:

In the top-right zone of the windows, you will see the following options:

For trial SDK, we will be able to use the WPF and WinForms frameworks. If you are fully related to windows forms, this option will be more comfortable. In this case I will use the Windows Presentation Foundation framework.
After clicked the framework to use, we will need to specify a folder where the project will be created:

Finally, the project will be created, and the Visual Studio will be opened and ready for execution.

Code Review
The main code will be wrapped inside MainWindow.xaml.cs. Here we will find the code for UI controls.

Inside the code we will check two methods that will create the properties that we need to draw correctly the chart.
AudioInput_started()
This method will be executed by the started event handler. It will initialize the methods that create the Monitors, spectrograms, and calculations.
This method will be executed by the started event handler.
It will initialize the methods that create the Monitors, spectrograms, and calculations.
private void AudioInput_Started(StartedEventArgs args)
        {
            _channelCount = args.ChannelCount;
            _samplingFrequency = (int)args.SamplesPerSecond;

            InitWaveformMonitors();
            InitSpectrograms();
InitFFTCalculator();- Parameters (Arguments):
- ChannelCount: Number of channels in the input sound.
- samplingFrequency: Samples per second.
- InitWaveFormMonitors:
- Before to start creating the waveforms, this validates that the number of channels is the same as the waveformMonitors length.
bool bCreate = false;
            if (_waveformMonitors != null)
            {
                if (_channelCount != _waveformMonitors.Length)
                {
                    DisposeWaveformMonitors();
                    bCreate = true;
                }
            }
            else
            {
                bCreate = true;
            }
If not, this will clean up all previous wave forms and will set true the bCreate flag.
- Creating the new waveforms:
- We need to disable the [SizeChanged] event handler (because we need to construct the waves from zero).
- The new wave objects will be stored in an array class named [_waveFormMonitors]. This class will inherit all the available properties given by the XY Lightning Chart object.
- Inside the [WaveFormMonitor] you will see an instance of LightningChart [_chart].
_chart = new LightningChart
                {
                    ChartName = "Waveform chart",
                    VerticalAlignment = VerticalAlignment.Top,
                    HorizontalAlignment = HorizontalAlignment.Left
};-
- We use this instance to established the UI properties for charts, like margin, title, font, font color, etc.
_chart.Title.Font = new WpfFont("Segoe UI", 14, true, false);
                _chart.Title.Align = ChartTitleAlignment.TopCenter;
                _chart.Title.Offset.SetValues(0, 25);
                _chart.Title.Color = lineColor;

                _chart.ViewXY.Margins = new Thickness(70, 10, 15, 10);
                _chart.ViewXY.ZoomPanOptions.ZoomRectLine.Color = Colors.Lime;

_chart.ViewXY.LegendBoxes[0].Visible = false;-
- We can set the UI properties for each Data Series by using the [SampleDataSeries] class.
SampleDataSeries sds = new SampleDataSeries(_chart.ViewXY, axisX, axisY);
                sds.LineStyle.Width = 1f;
                sds.LineStyle.Color = lineColor;
                sds.LineStyle.AntiAliasing = LineAntialias.None;
                sds.ScrollingStabilizing = true;
                sds.AllowUserInteraction = false;
_chart.ViewXY.SampleDataSeries.Add(sds);-
- We can set the UI properties for each axis included in the chart. In this case, we are working with two axes: X & Y.
AxisX axisX = _chart.ViewXY.XAxes[0];
                axisX.Maximum = 10;
                axisX.SweepingGap = 2;
                axisX.ScrollMode = XAxisScrollMode.Scrolling;
                axisX.Title.Text = "Range";
                axisX.Title.VerticalAlign = XAxisTitleAlignmentVertical.Top;
                axisX.Title.HorizontalAlign = XAxisTitleAlignmentHorizontal.Right;
                axisX.LabelsPosition = Alignment.Near;
                axisX.LabelsFont = new WpfFont("Segoe UI", 13, false, false);
                axisX.MajorDivTickStyle.Visible = false;
                axisX.MinorDivTickStyle.Visible = false;
                axisX.MajorGrid.Visible = false;
                axisX.MinorGrid.Visible = false;
                axisX.LabelsVisible = false;
                axisX.SteppingInterval = 1;
                axisX.AllowScaling = false;
                axisX.AllowScrolling = false;
                axisX.AxisThickness = 1;

                AxisY axisY = _chart.ViewXY.YAxes[0];
                axisY.SetRange(-30000, 30000);
                axisY.Title.Visible = false;
axisY.LabelsFont = new WpfFont("Segoe UI", 13, false, false);-
- The cursor behaviors can be configured by using the [LineSeriesCursor] class.
LineSeriesCursor cursor1 = new LineSeriesCursor(_chart.ViewXY, axisX)
                {
                    ValueAtXAxis = 1
                };
                cursor1.LineStyle.Width = 6;

                Color color = Colors.OrangeRed;
                cursor1.LineStyle.Color = Color.FromArgb(180, color.R, color.G, color.B);

                cursor1.FullHeight = true;
                cursor1.SnapToPoints = true;
                cursor1.Style = CursorStyle.PointTracking;
                cursor1.TrackPoint.Color1 = Colors.Yellow;
                cursor1.TrackPoint.Color2 = Colors.Transparent;
                cursor1.TrackPoint.Shape = Shape.Circle;
_chart.ViewXY.LineSeriesCursors.Add(cursor1);- Creating a waveform for each channel:
for (int i = 0; i < _channelCount; i++)
                {
                    WaveformMonitor wm =
                        new WaveformMonitor(
                            gridChart,
                            0.25,
                            DefaultColors.SeriesForBlackBackgroundWpf[i % DefaultColors.SeriesForBlackBackgroundWpf.Length],
                            null
                        );
                    wm.Chart.ChartName = "Waveform Chart " + (i + 1).ToString();

                    _waveformMonitors[i] = wm;
}- Re-enable size changed handle:
gridChart.SizeChanged += gridChart_SizeChanged;
            }
The [gridChart_SizeChanged] function will execute the [ArrangeMonitors] method. This method will calculate the row sizes (Height, Weight, bounds) for each wave form in the monitor.
The [gridChart_SizeChanged] function will execute the [ArrangeMonitors] method.
This method will calculate the row sizes (Height, Weight, bounds) for each wave form in the monitor.
AudioInput_DataGenerated()
This method will orchestrate other functions that will feed and calculate the data for waveforms.
- For each wave that we created before, the [FeedData] function will be executed. This function will add the samples to the current waveform.
if (_waveformMonitors != null)
            {
                foreach (WaveformMonitor wm in _waveformMonitors)
                {
                    wm.FeedData(samples[channelNumber]);
                    channelNumber++;
                }
}- Feeding multichannel data to the FFT calculator. If it gives a calculated result, the multi-channel result is set to the selected FFT chart
if (_calculatorFFT != null)
            {
                double[][][] valuesY;
                double[][][] xValues;

                if (_calculatorFFT.FeedDataAndCalculate(samples, out xValues, out valuesY))
                {
                    int rows = xValues.Length;

                    for (channelNumber = 0; channelNumber < _channelCount; channelNumber++)
                    {
                        if (_spectrograms2D != null)
                        {
                            _spectrograms2D[channelNumber].SetData(valuesY, channelNumber, rows);
                        }
                    }
                }
            }
}- FeedDataAndCalculate.
- Parameters:
- data: Sample data stream
- xValues (out): x Values by channels
- yValues (out): y values by channels
- Parameters:
public bool FeedDataAndCalculate(double[][] data, out double[][][] xValues, out double[][][] yValues)
            {
                xValues = null;
                yValues = null;
Variables:
- channelCounter: reference to _channelCount variable (It contains the number of channels in the stream).
- ticksNow: the time ticks.
- giveDataout: The flag allows the data to be rendered.
- samplesPerUpdate: Counts how many samples should be rendered per update.
- repeatFFT: Number of repeated rounds in a loop for FFT data output. Sample length/samples per update.
// Reference to member variable channel counter.
                int channelCounter = _channelCount;

                // Timer ticks.
                long ticksNow = DateTime.Now.Ticks;

                // Flag allows data to be rendered.
                bool giveDataOut = false;

                // Count how many samples should be rendered per update.
                int samplesPerUpdate = (int)(_intervalMs * _samplingFrequency / 1000.0);

                // Amount of repeated rounds in a loop for FFT data output. Samples length / samples per update.
int repeatFFT;- This method calculates the number of FFT calculation points from the data parameter.
- Buffers are allocated based on the number of channels.
- An extended buffer is created with old and new data.
- The FFT spectrum data is calculated.
- Buffers for FFT data are reallocated for each channel.
- The returned data will set the resolution and range of both axes in the spectrogram:
if (_spectrograms2D != null)
                        {
                            _spectrograms2D[channelNumber].SetData(valuesY, channelNumber, rows);
                        }
_chart.BeginUpdate();
for (int row = 0; row < rowCount; row++)
{
double[] valuesY = yValues[row][channelIndex];
//Only accept resolution count of data points
Array.Resize(ref yValues, _resolution);
//move the old time slots one step earlier
for (int timeSlot = 1; timeSlot < _timeSlots; timeSlot++)
{
data[timeSlot - 1] = data[timeSlot]; //change the reference
}
data[_timeSlots - 1] = valuesY;
}- BeginUpdate(): Disables control repaints when updating the status of many properties or updating series points.
if (_horizontalScrolling)
            {
                _chart.ViewXY.XAxes[0].SetRange(dCurrentTimeMin + dTotalTimeShift, dCurrentTimeMin + dTotalTimeShift + _timeRange);
            }
            else
            {
                _chart.ViewXY.YAxes[0].SetRange(dCurrentTimeMin + dTotalTimeShift, dCurrentTimeMin + dTotalTimeShift + _timeRange);
            }

            _grid.SetRangesXY(_chart.ViewXY.XAxes[0].Minimum, _chart.ViewXY.XAxes[0].Maximum,
                _chart.ViewXY.YAxes[0].Minimum, _chart.ViewXY.YAxes[0].Maximum);

            _currentTime += dTotalTimeShift;

_chart.EndUpdate();- EndUpdate(): Enables control repaints.
Final Application
In this exercise, we were able to create a chart that allows us to have a more detailed audio study. Lightning Charts, allows us to use the properties of an XY-type chart, in order to generate a spectrogram and a WaveForm for one, two, or more channels within an audio file.
Carrying out this type of study alone could be too difficult without solid knowledge. But again, Lightning Charts allowed us to build an app with a rich interface with real-time processing. The methods explained are responsible for generating the waveforms and spectrograms, but with this template, you will be able to modify the user interface and the actions of each button, according to the requirements and behaviors you need.
In this exercise, we were able to create a chart that allows us to have a more detailed audio study.
Lightning Charts, allows us to use the properties of an XY-type chart, in order to generate a spectrogram and a WaveForm for one, two, or more channels within an audio file.
Carrying out this type of study alone could be too difficult without solid knowledge.
But again, Lightning Charts allowed us to build an app with a rich interface with real-time processing.
The methods explained are responsible for generating the waveforms and spectrograms, but with this template, you will be able to modify the user interface and the actions of each button, according to the requirements and behaviors you need.
Cheers!

Omar Urbano
Software Engineer
Continue learning with LightningChart
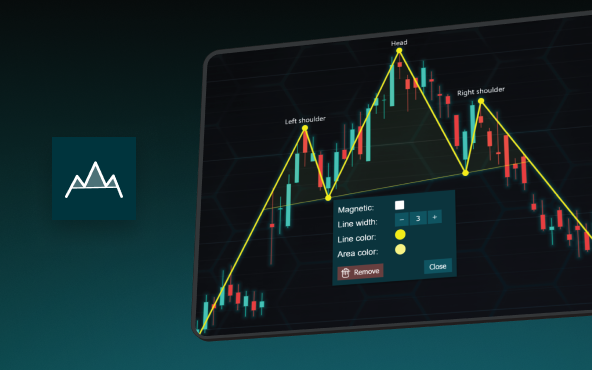
The Head and Shoulders Pattern in Technical Analysis
The Head and Shoulders Pattern in Technical Analysis The Head and Shoulders Pattern in Technical Analysis The Head and Shoulders pattern is one of the most recognized and widely used chart patterns in technical analysis. It is considered a reliable reversal pattern...
Best Telerik Charts Alternative in 2026: GPU Performance for WPF, WinForms, and Web
Telerik from Progress is a comprehensive UI component suite covering WPF, WinForms, ASP.NET, Blazor, and JavaScript. The charting components: RadChartView for WPF and WinForms, and Kendo UI Charts for web and Blazor, arrive bundled with the suite purchase. For teams...
Streaming Data Visualization with WebSockets (2026): The Complete Tutorial
Every WebSocket tutorial on the internet shows the same thing: a server sends a random number every second, a chart updates. It works. The demo looks great. Then you deploy to production, your IoT sensors push 800 updates per second across twelve channels, and the...


If you have any questions, feel free to contact us!
©LightningChart Ltd 2026. All rights reserved.