Using LightningChart in C++ applications
LightningChart is a .NET library which can be most fluently used with C# and VB.NET language. However, it is possible to use LightningChart in C++ Win32 applications as well, including MFC applications. The application using LightningChart must be compiled with Common Language Runtime Support (/clr) option. When creating a Windows Form Project using C++, refer to the detailed step by step tutorial below.
Install required C++/CLR packages
Make sure your Visual Studio have installed C++ package with C++/CLR. For example, run Visual Studio Installer, and select update/modify button. From Workloads select Desktop development with C++. From Individual components select C++/CLI support.
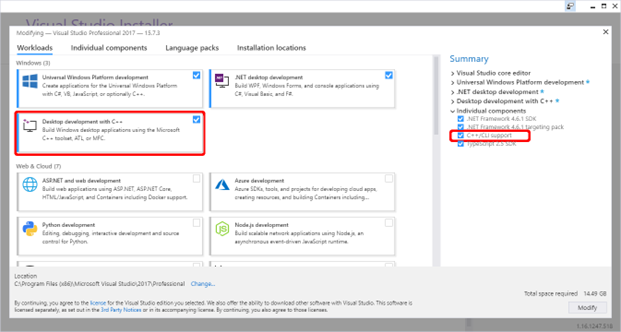
Visual Studio Installer selections for C++ project.
Setting Visual Studio project
Open Visual Studio and create a new project. If all the required packages and components described above are installed, the following selection is available when creating new project:
Templates -> Visual C++ -> CLR -> CLR Empty project (.NET Framework).
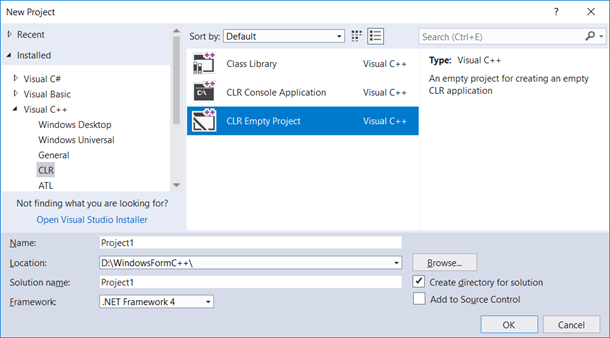
Windows Forms C++ project template.
Right click the created project and choose Properties option. Modify
Configuration Properties -> Linker -> System -> SubSystem -> Windows
and
Linker -> Advanced -> Entry point -> Main
as shown in the next figure below.
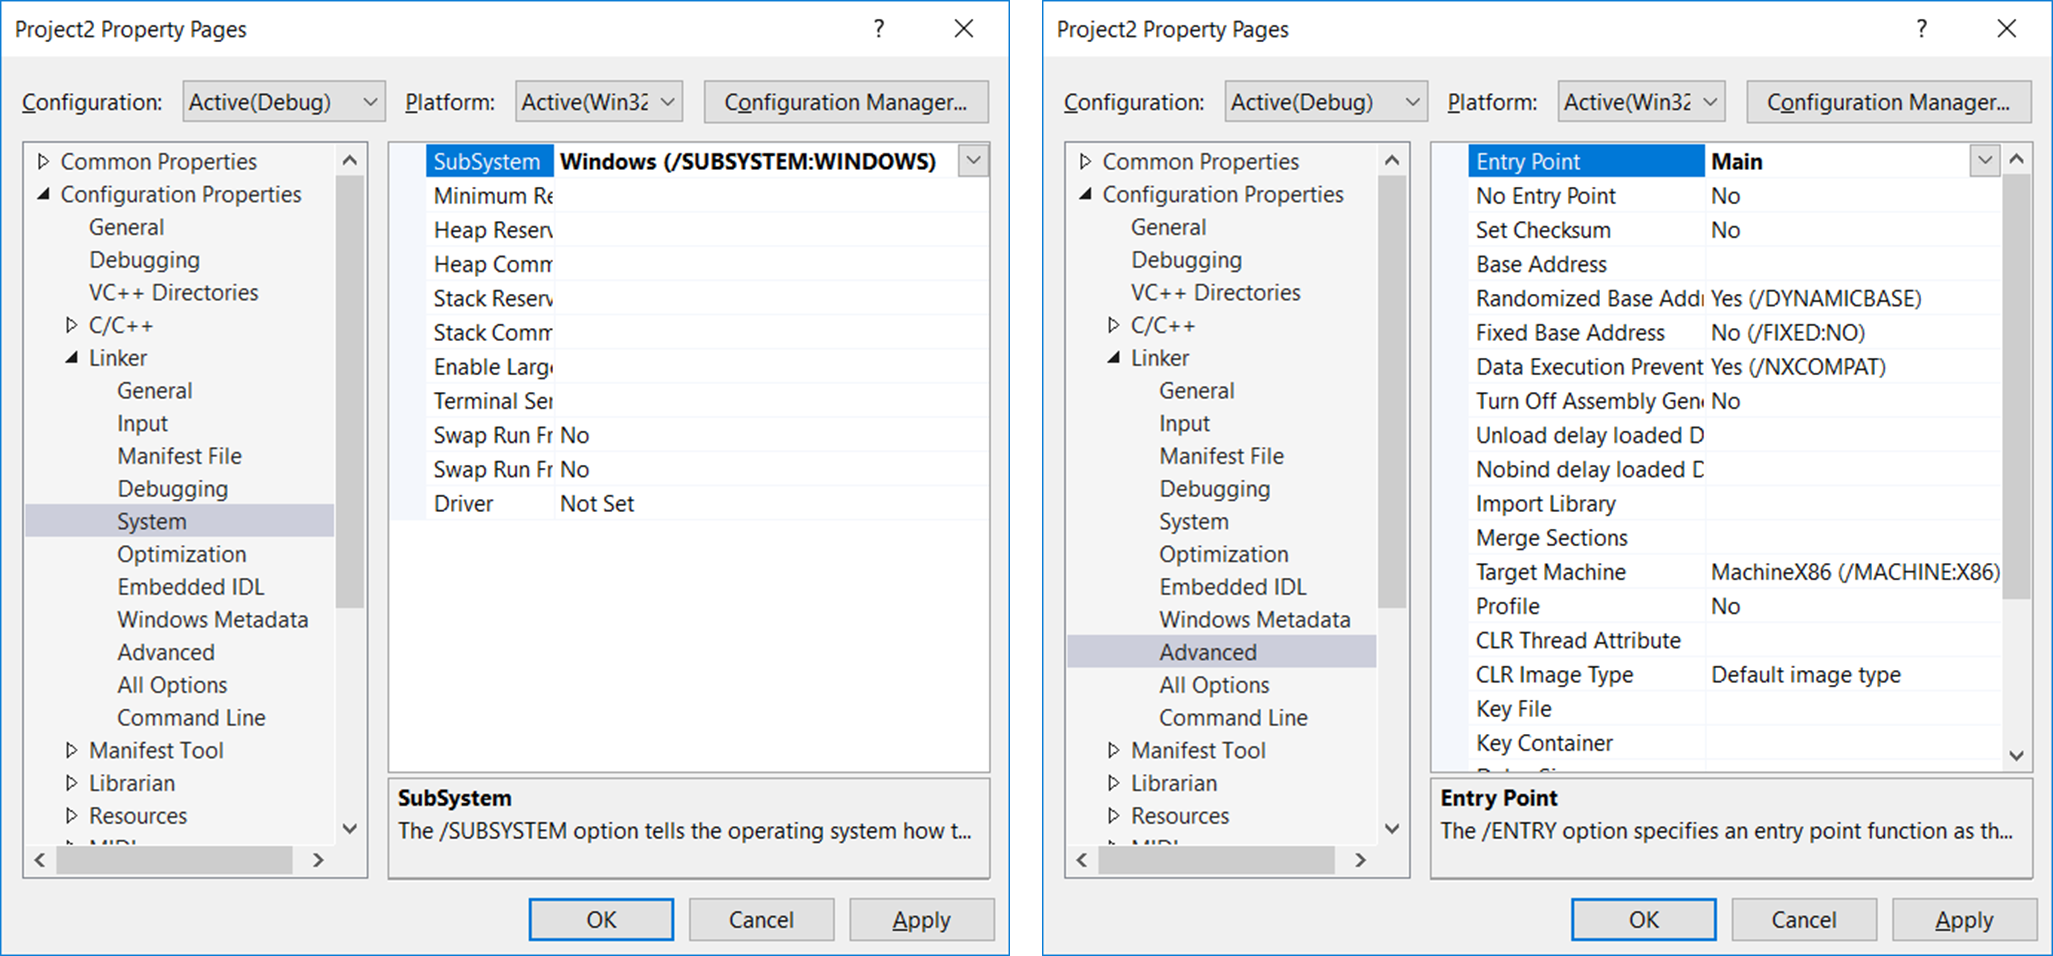
C++ project property pages.
Add Windows Form Item to the project: right click the project and choose Add -> New Item... Select Windows Form as shown in the next figure below. It is possible to get an error message: The data necessary to complete this operation is not yet available. (Exception from HRESULT: 0x8000000A). This can be ignored, just close it and proceed to the next step.
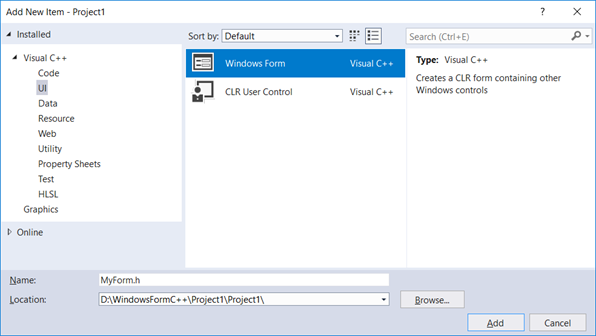
Add new Windows Forms item in C++ project.
Add the following code to the created form (in this example MyForm.cpp), save it and close the Visual Studio.
#include "MyForm.h"

using namespace System;
using namespace System::Windows::Forms;

[STAThreadAttribute]
void Main(array<String^>^ args) {
	Application::EnableVisualStyles();
	Application::SetCompatibleTextRenderingDefault(false);
	Project1::MyForm form;
	Application::Run(%form);
}
The project is ready to be built for the first time. Reopen the project and select Build -> Rebuild Solution. When the project is running, an empty Windows Form should be seen.
Creating LightningChart application in C++ project
Components can now be added to the form by editing MyForm.h file. Below is a simple example how to create a chart with PointLineSeries in it. Include LightningChart’s WinForms DLL in references list and add relevant namespaces in MyForm.h code file.
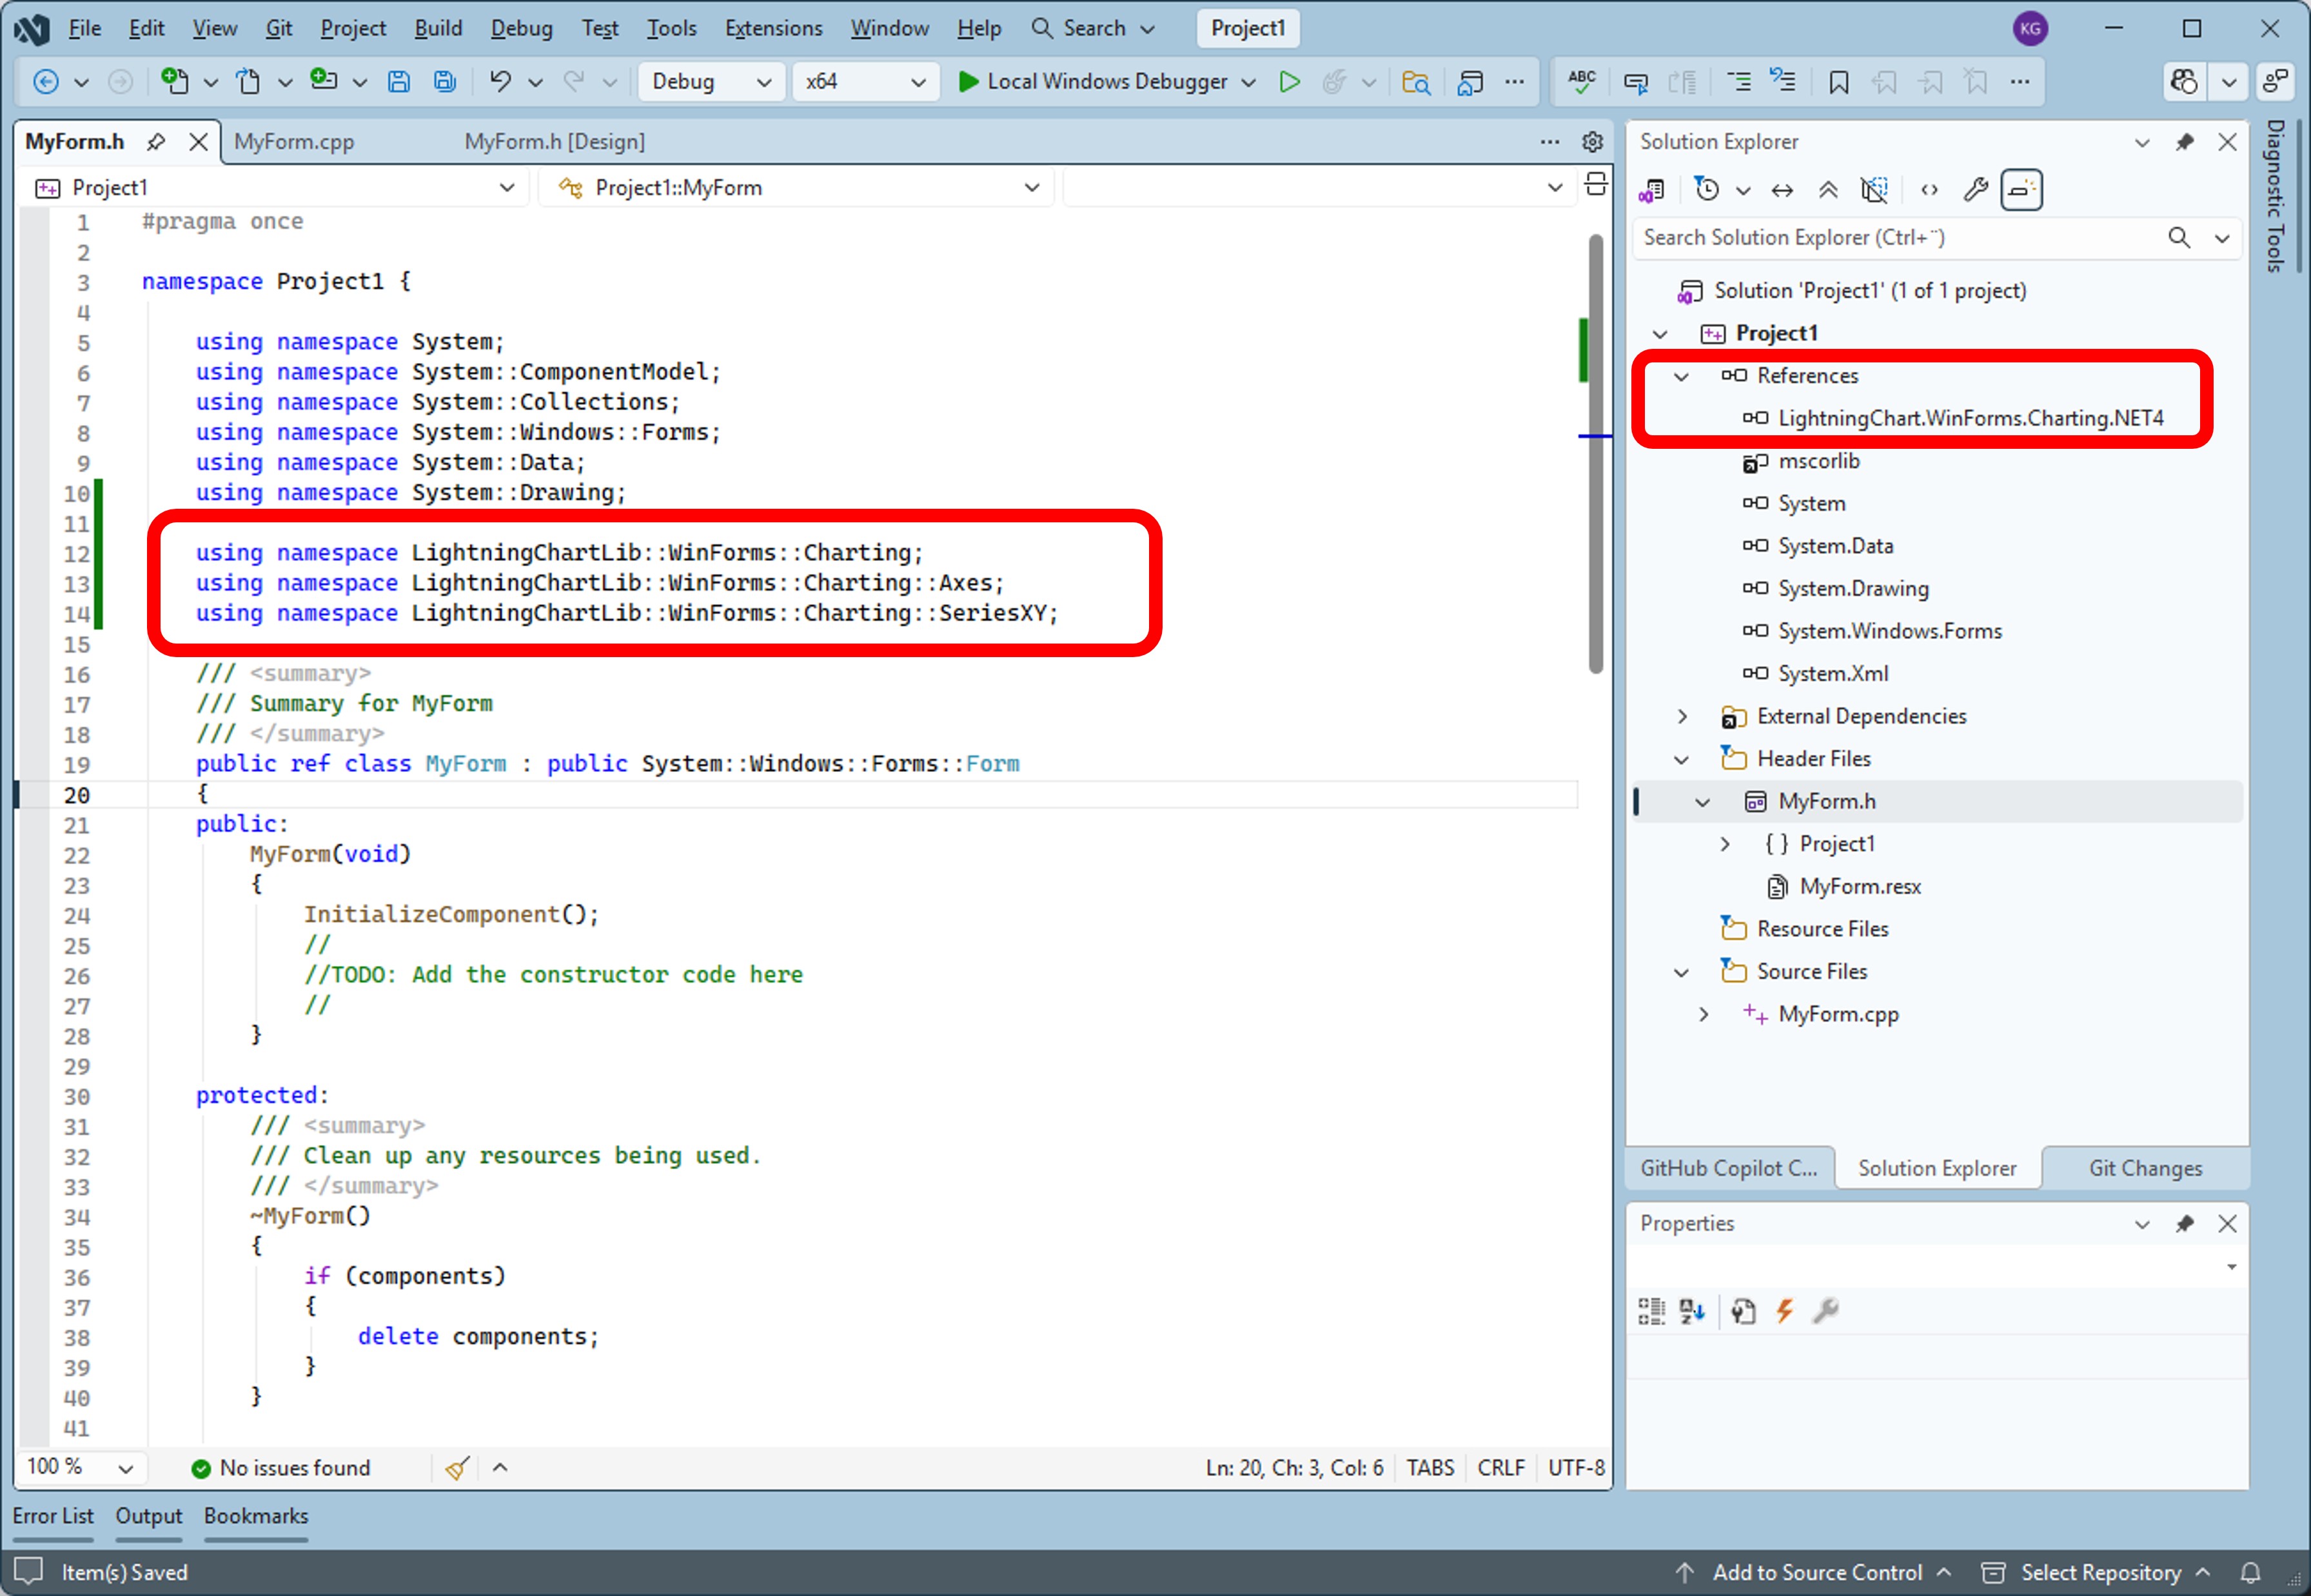
Include LightningChart.WinForms.Charting.NET4 in references list and add relevant namespaces in the project.
Declare a ‘chart’ variable and set its properties. Below is an example of a chart creation method.
protected:
LightningChart ^ _chart;

void CreateChart()
{
	_chart = gcnew LightningChart();

	//Disable repaints for every property change
	_chart->BeginUpdate();

	//Set parent window by window handle
	_chart->Parent = this;

	//Fill the form area
	_chart->Dock = DockStyle::Fill;

	_chart->ActiveView = ActiveView::ViewXY;

	// Configure x-axis.
	AxisX^ axisX = _chart->ViewXY->XAxes[0];
	axisX->SetRange(0, 20);
	axisX->ScrollMode = XAxisScrollMode::None;
	axisX->ValueType = AxisValueType::Number;

	// Configure y-axis.
	AxisY^ axisY = _chart->ViewXY->YAxes[0];
	axisY->SetRange(0, 100);

	PointLineSeries^ pls1 = gcnew PointLineSeries(_chart->ViewXY, axisX, axisY);
	pls1->LineStyle->Color = Color::Yellow;
	pls1->Title->Text = "New Title";
	pls1->PointsVisible = true;
	pls1->LineVisible = true;
	_chart->ViewXY->PointLineSeries->Add(pls1);

	// Generate random data.
	Random rand;
	int pointCount = 21;

	array<SeriesPoint> ^ points = gcnew array<SeriesPoint>(pointCount);
	for (int point = 0; point < pointCount; point++)
	{
		points[point].X = (double)point;
		points[point].Y = 100.0 * rand.NextDouble();
	}

	pls1->Points = points;

	// Allow chart rendering.
	_chart->EndUpdate();
}
The resulting application when compiled and executed:
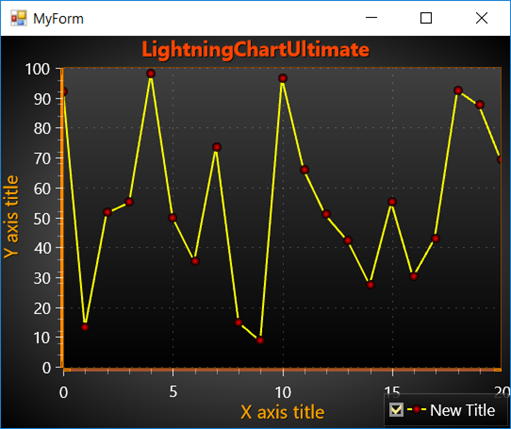
Example application executed.